Giving Up and Making Progress

I’m a little frustrated, and a little irritated. MyMateVince is using Anker power bricks to supply power to many of his mobile projects. Anker themselves said that the power brick I ordered would supply the juice I needed. But, dang it, I couldn’t get it to work. I couldn’t get more power out of the USB ports than the standard amperage, and I couldn’t figure out how to trigger their PowerIQ to open up the floodgates. So, finally, after all of the tries in the previous post, and a few more, I gave up and contacted support

Assembled and updating

Support immediately told me that it was not possible with their current generation of power bricks. There may or may not have been some slamming of my head into my desk. I will neither confirm nor deny. The battery is now being returned for a full refund.

Ahem

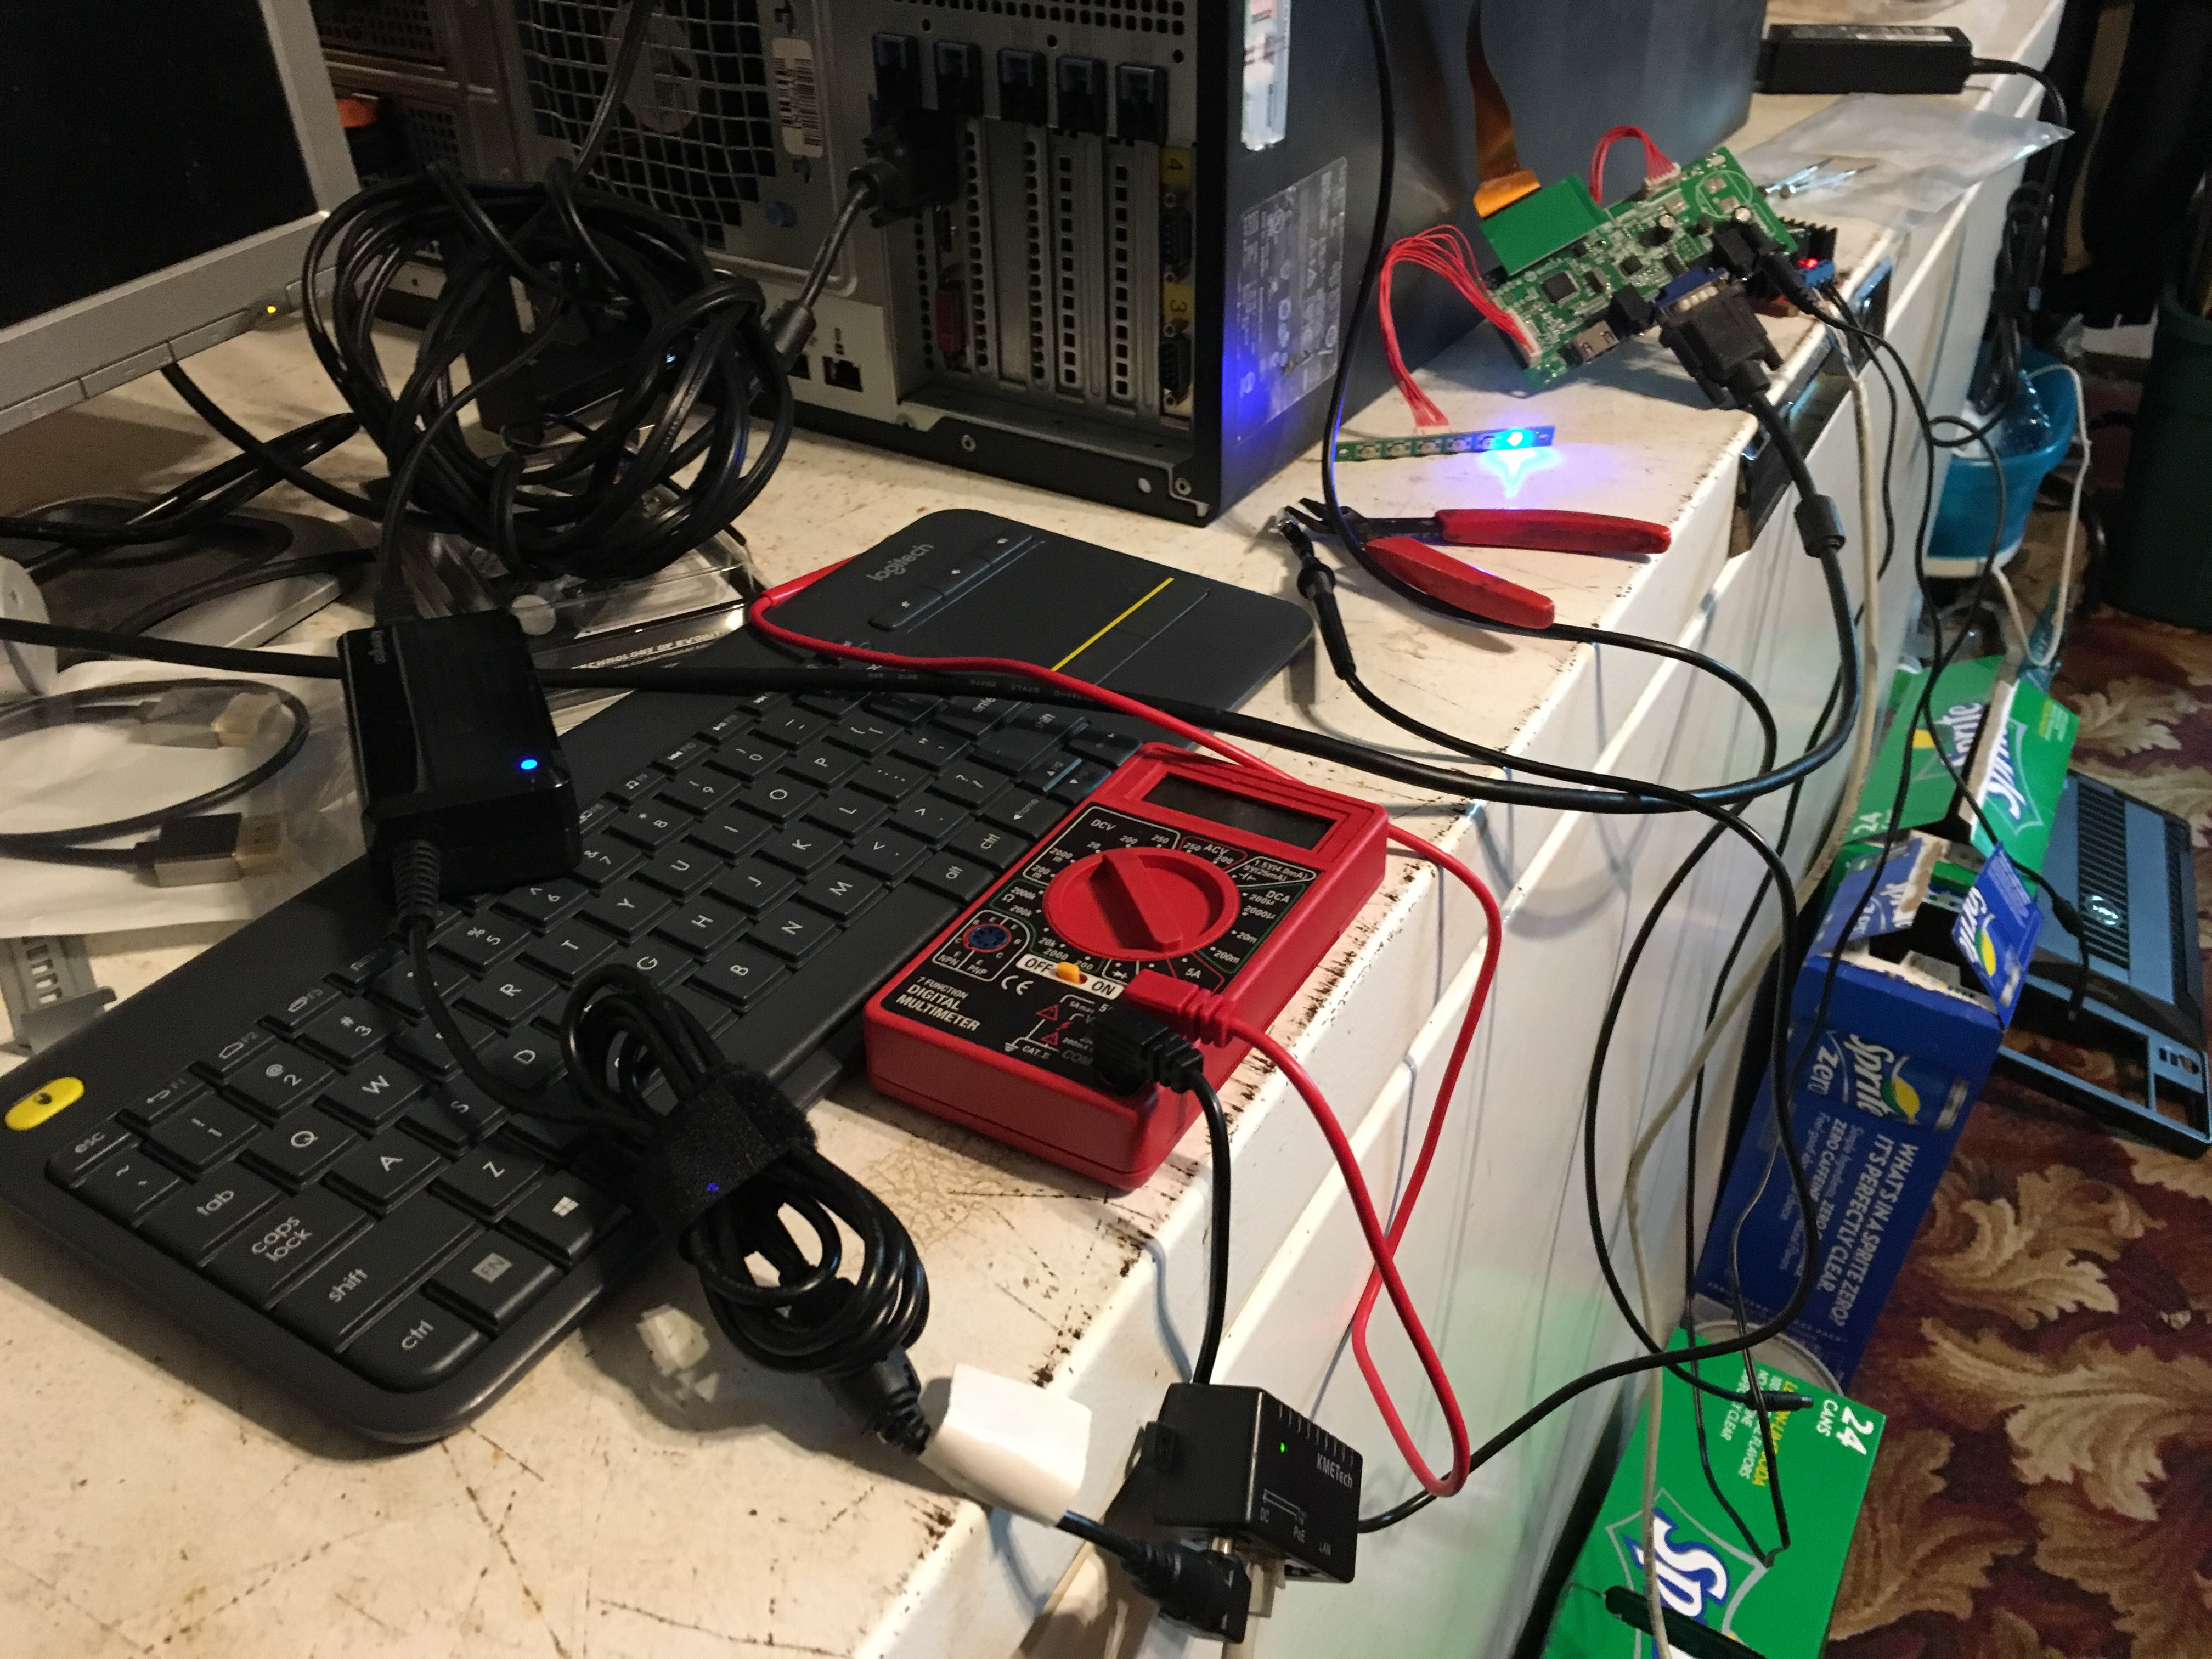
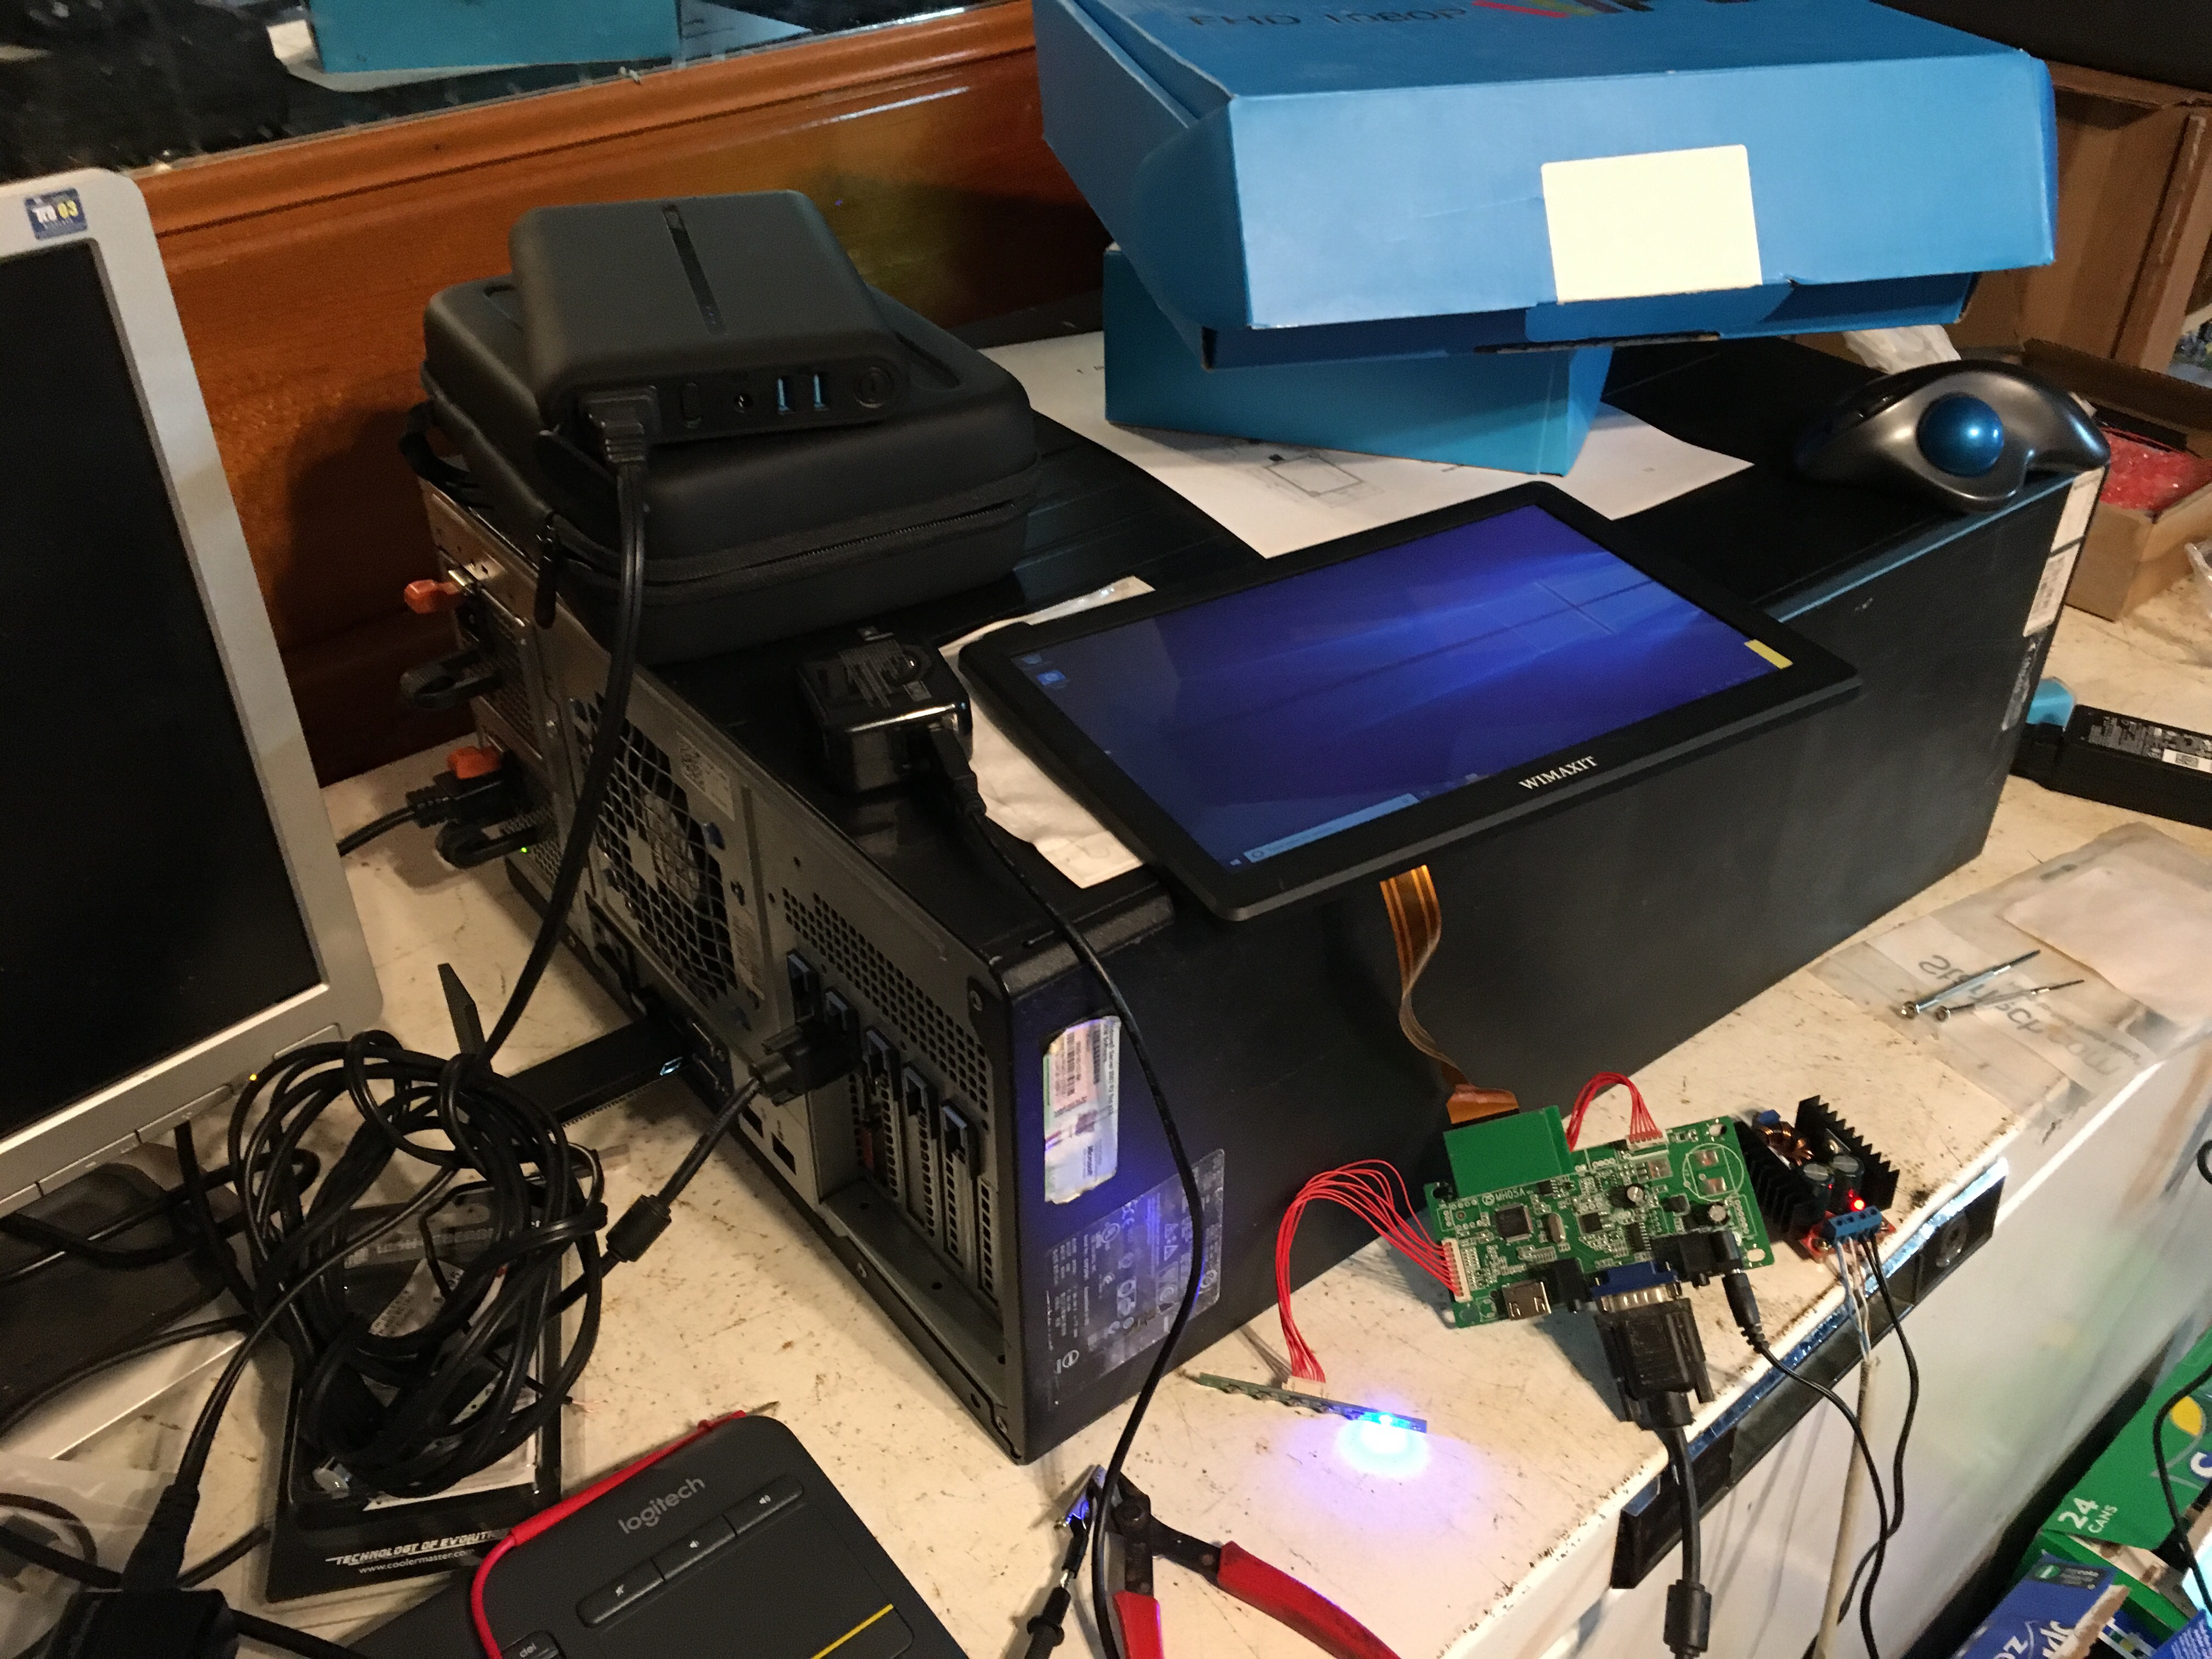
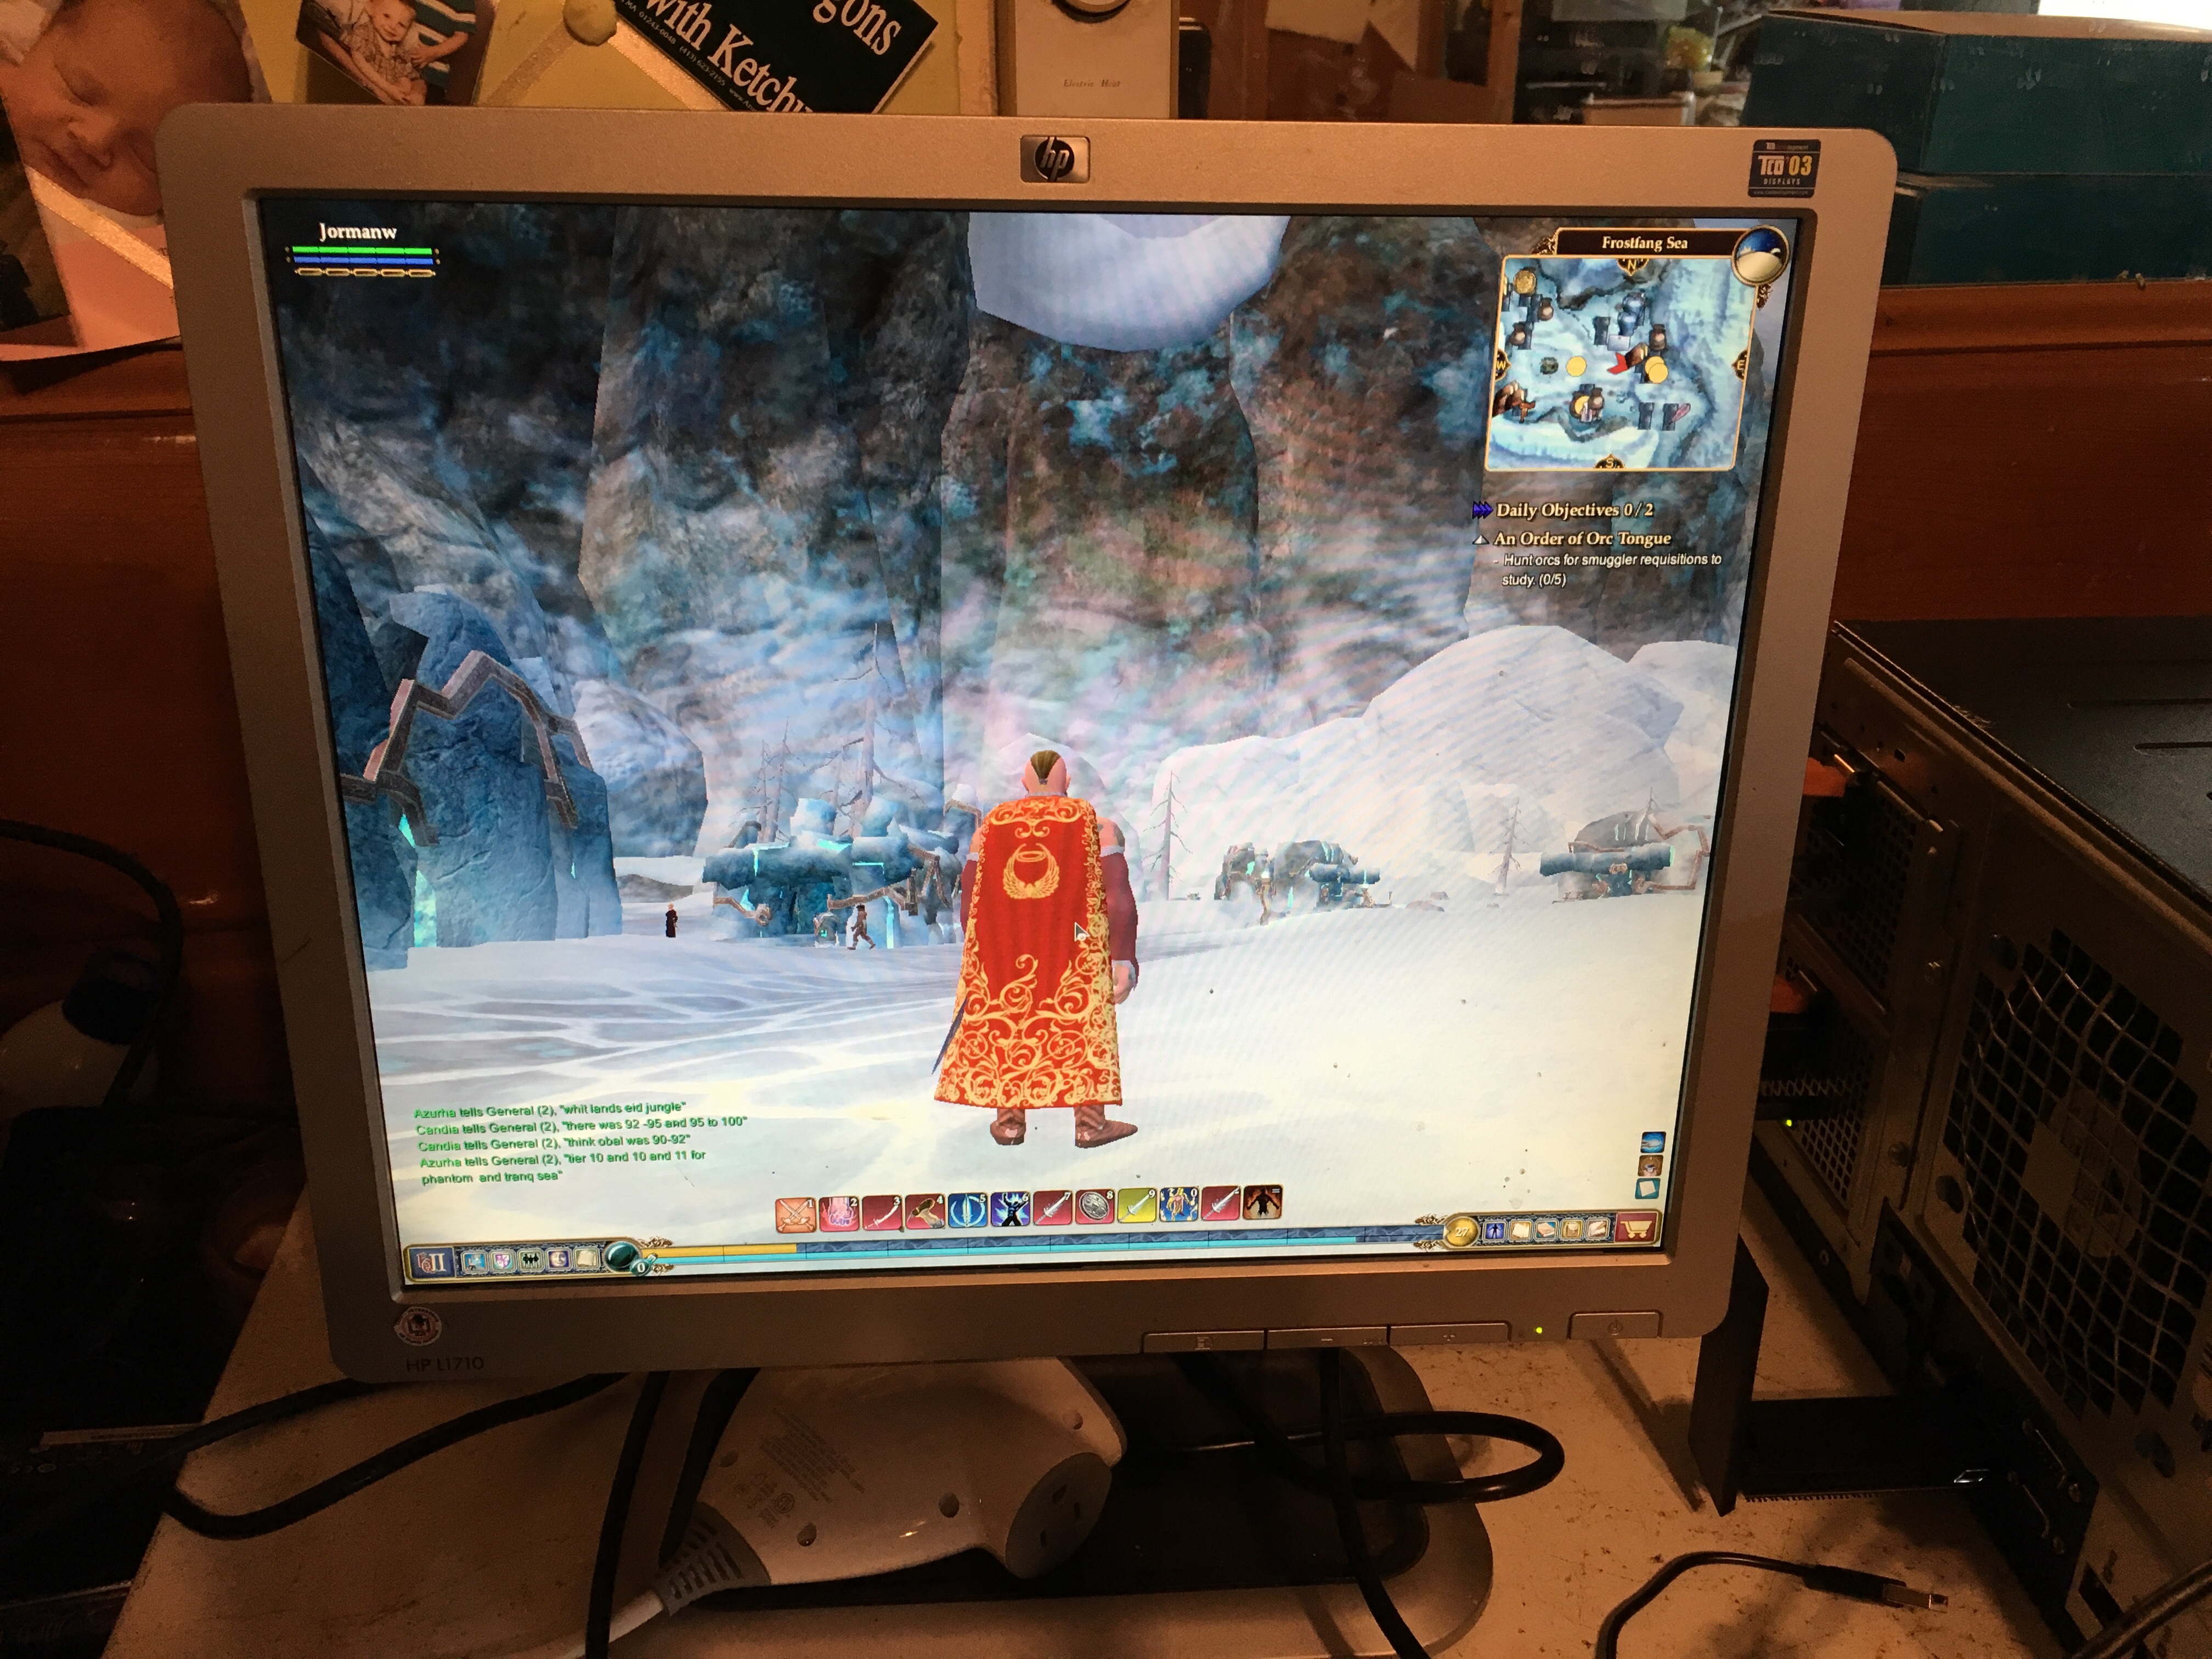
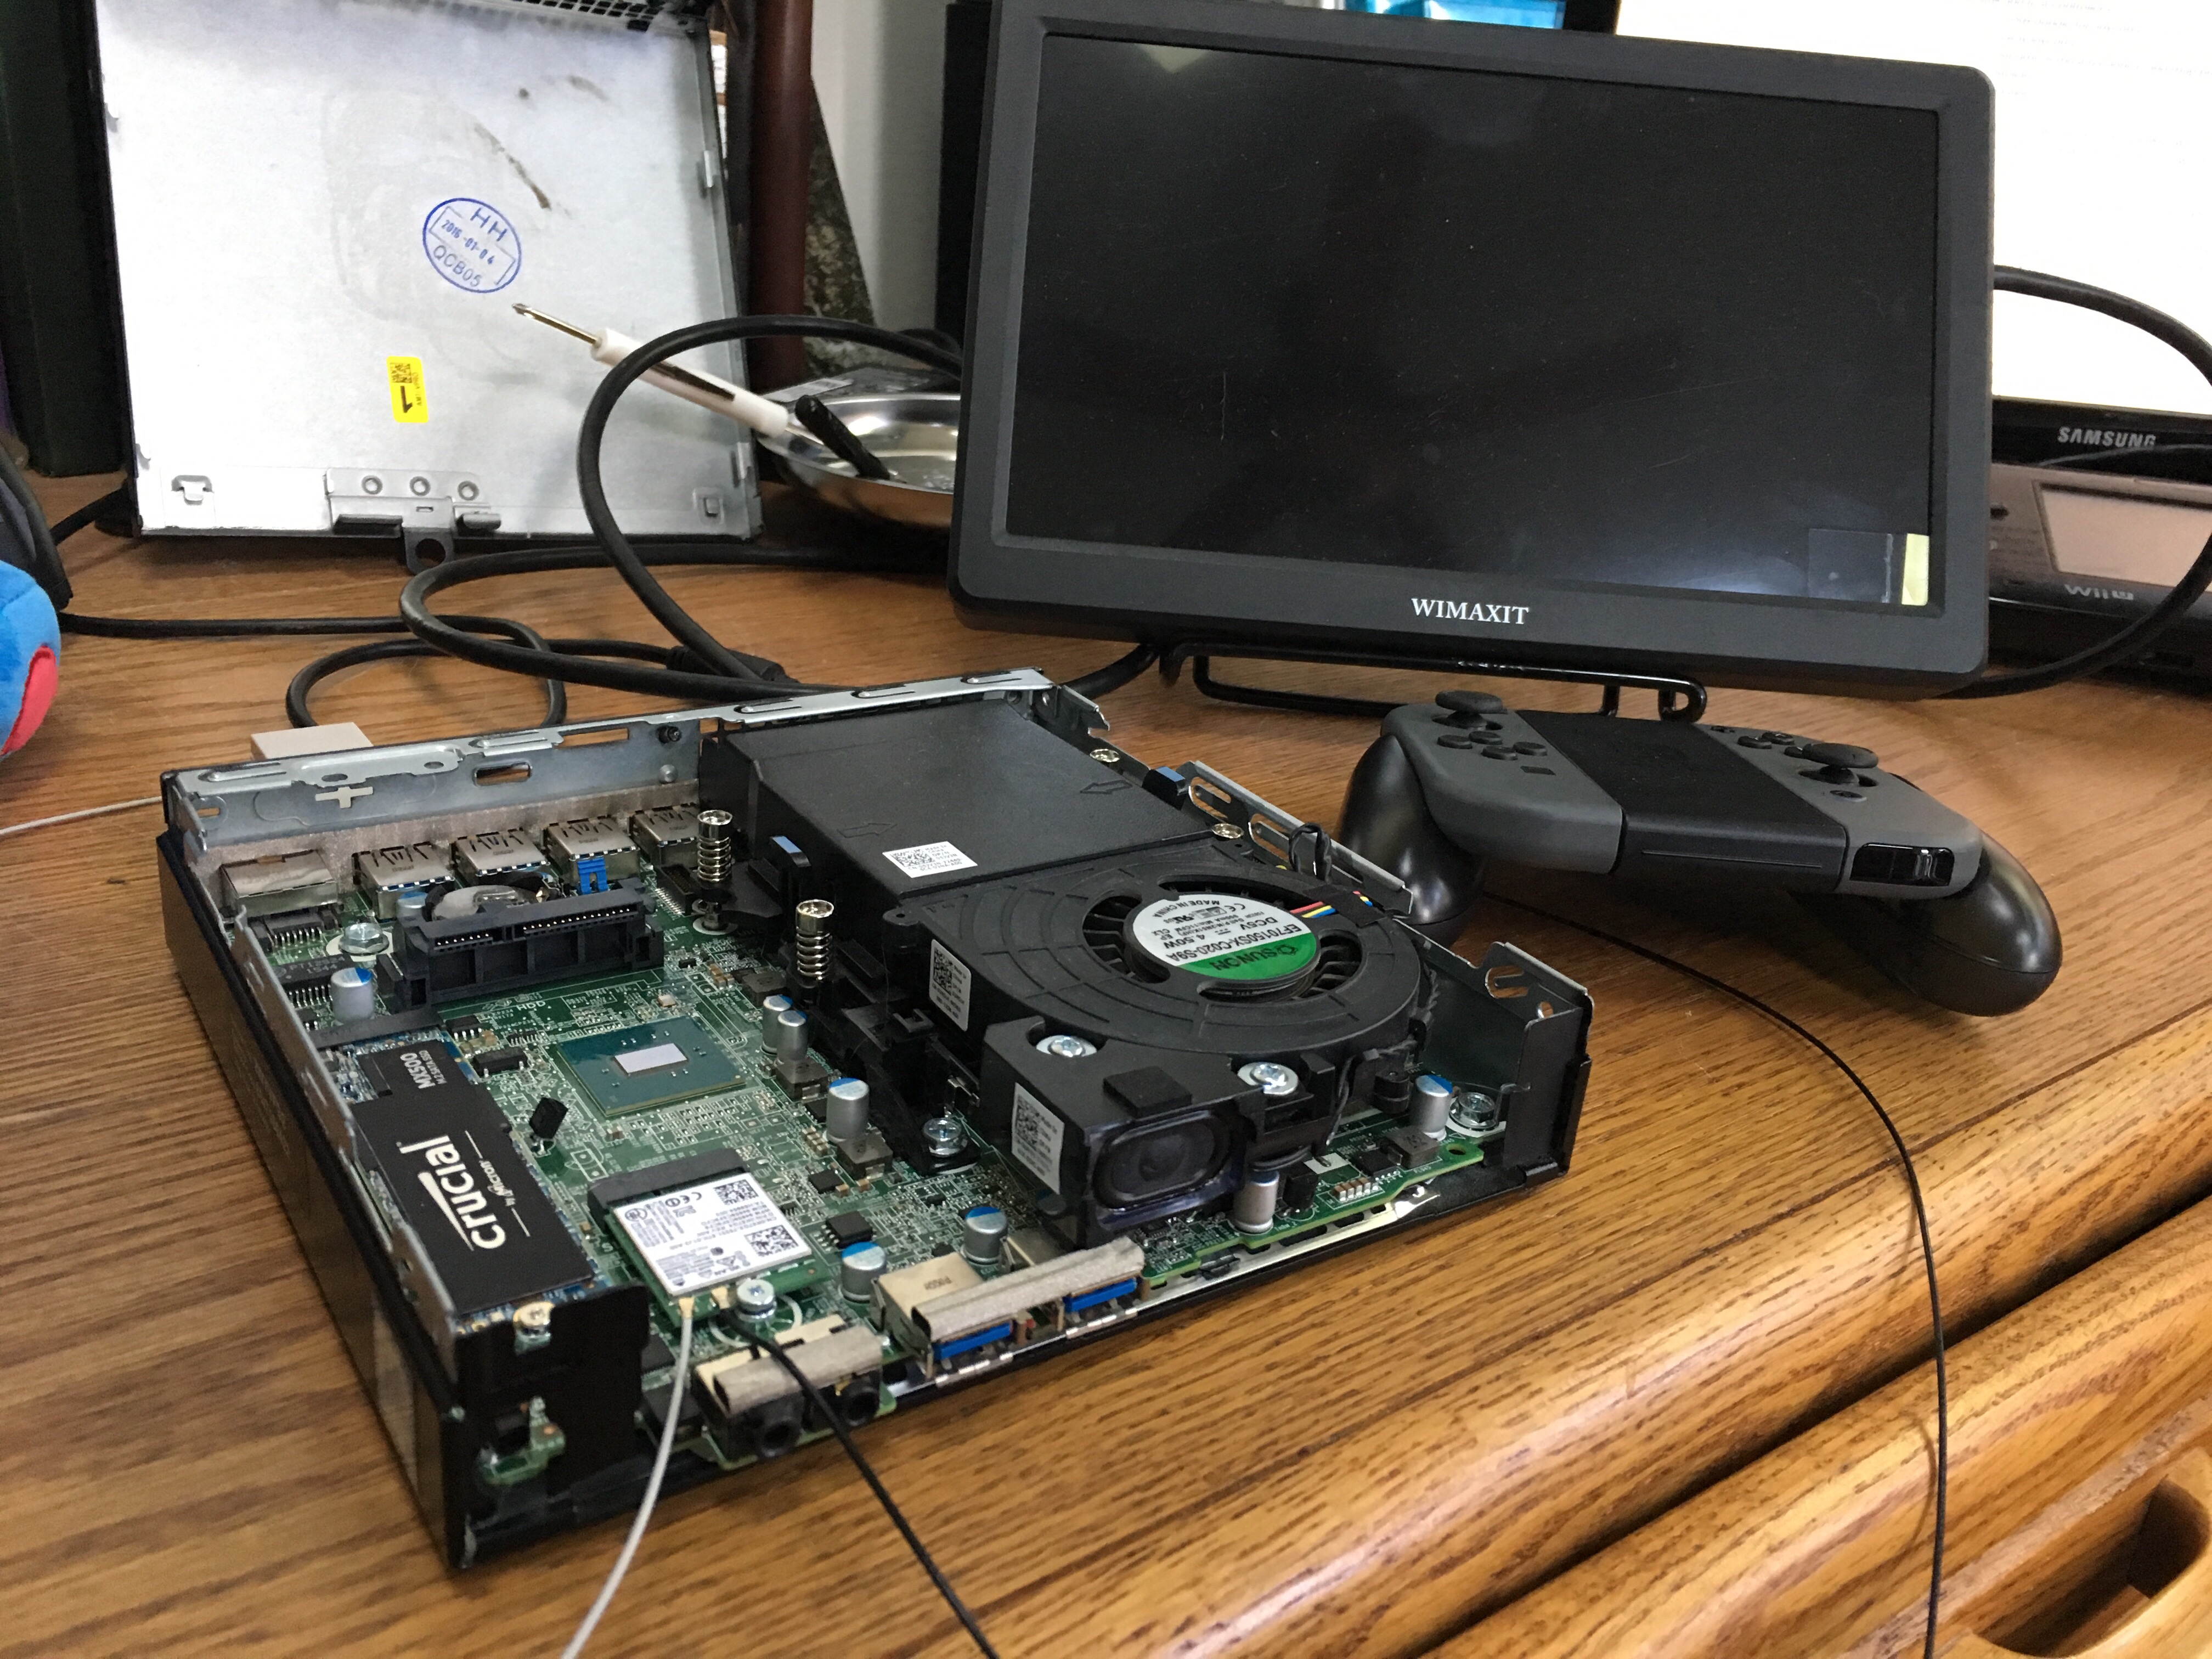
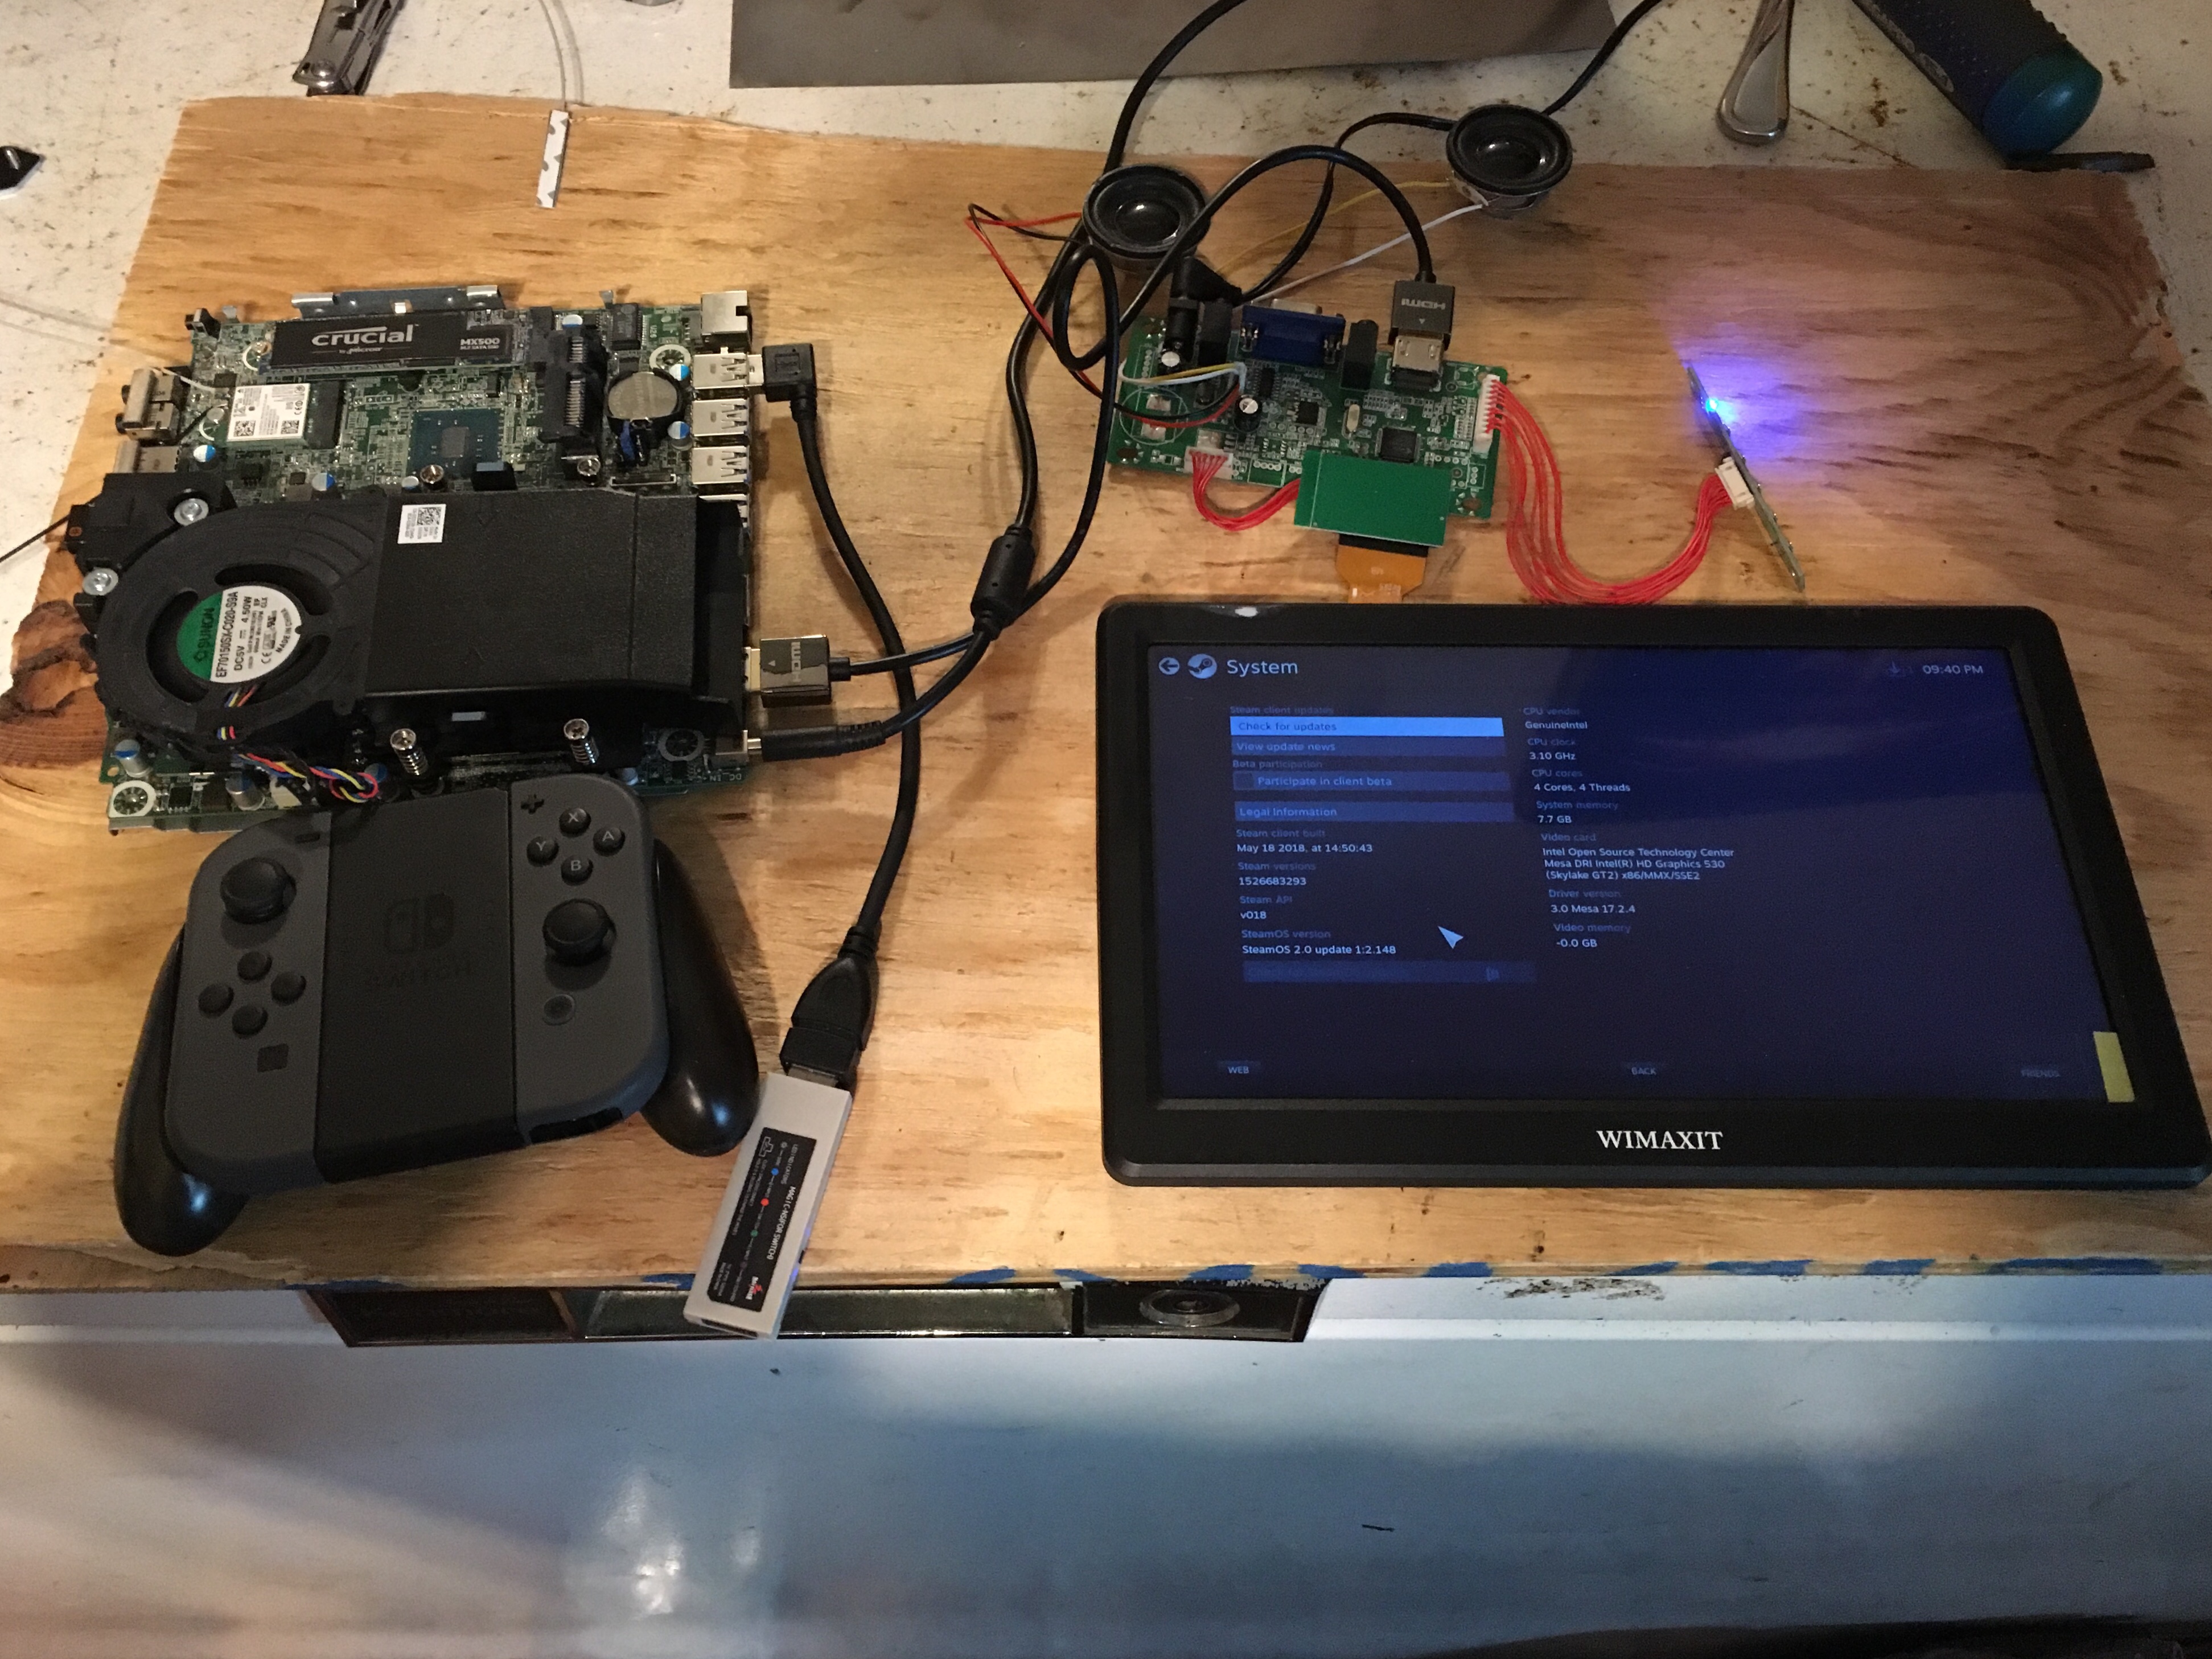
This led me to table the idea of powering the first version by battery, and instead focus on a portable, if plugged in, version. Which led to re-assembling the machine, updating the software, and confirming that all the things still worked with all the other things. And they did! The games run even better now that Steam is pushing so hard for more Linux compatibility, some visual artifacts have disappeared, and my available library has more than doubled.

Mocking up the case

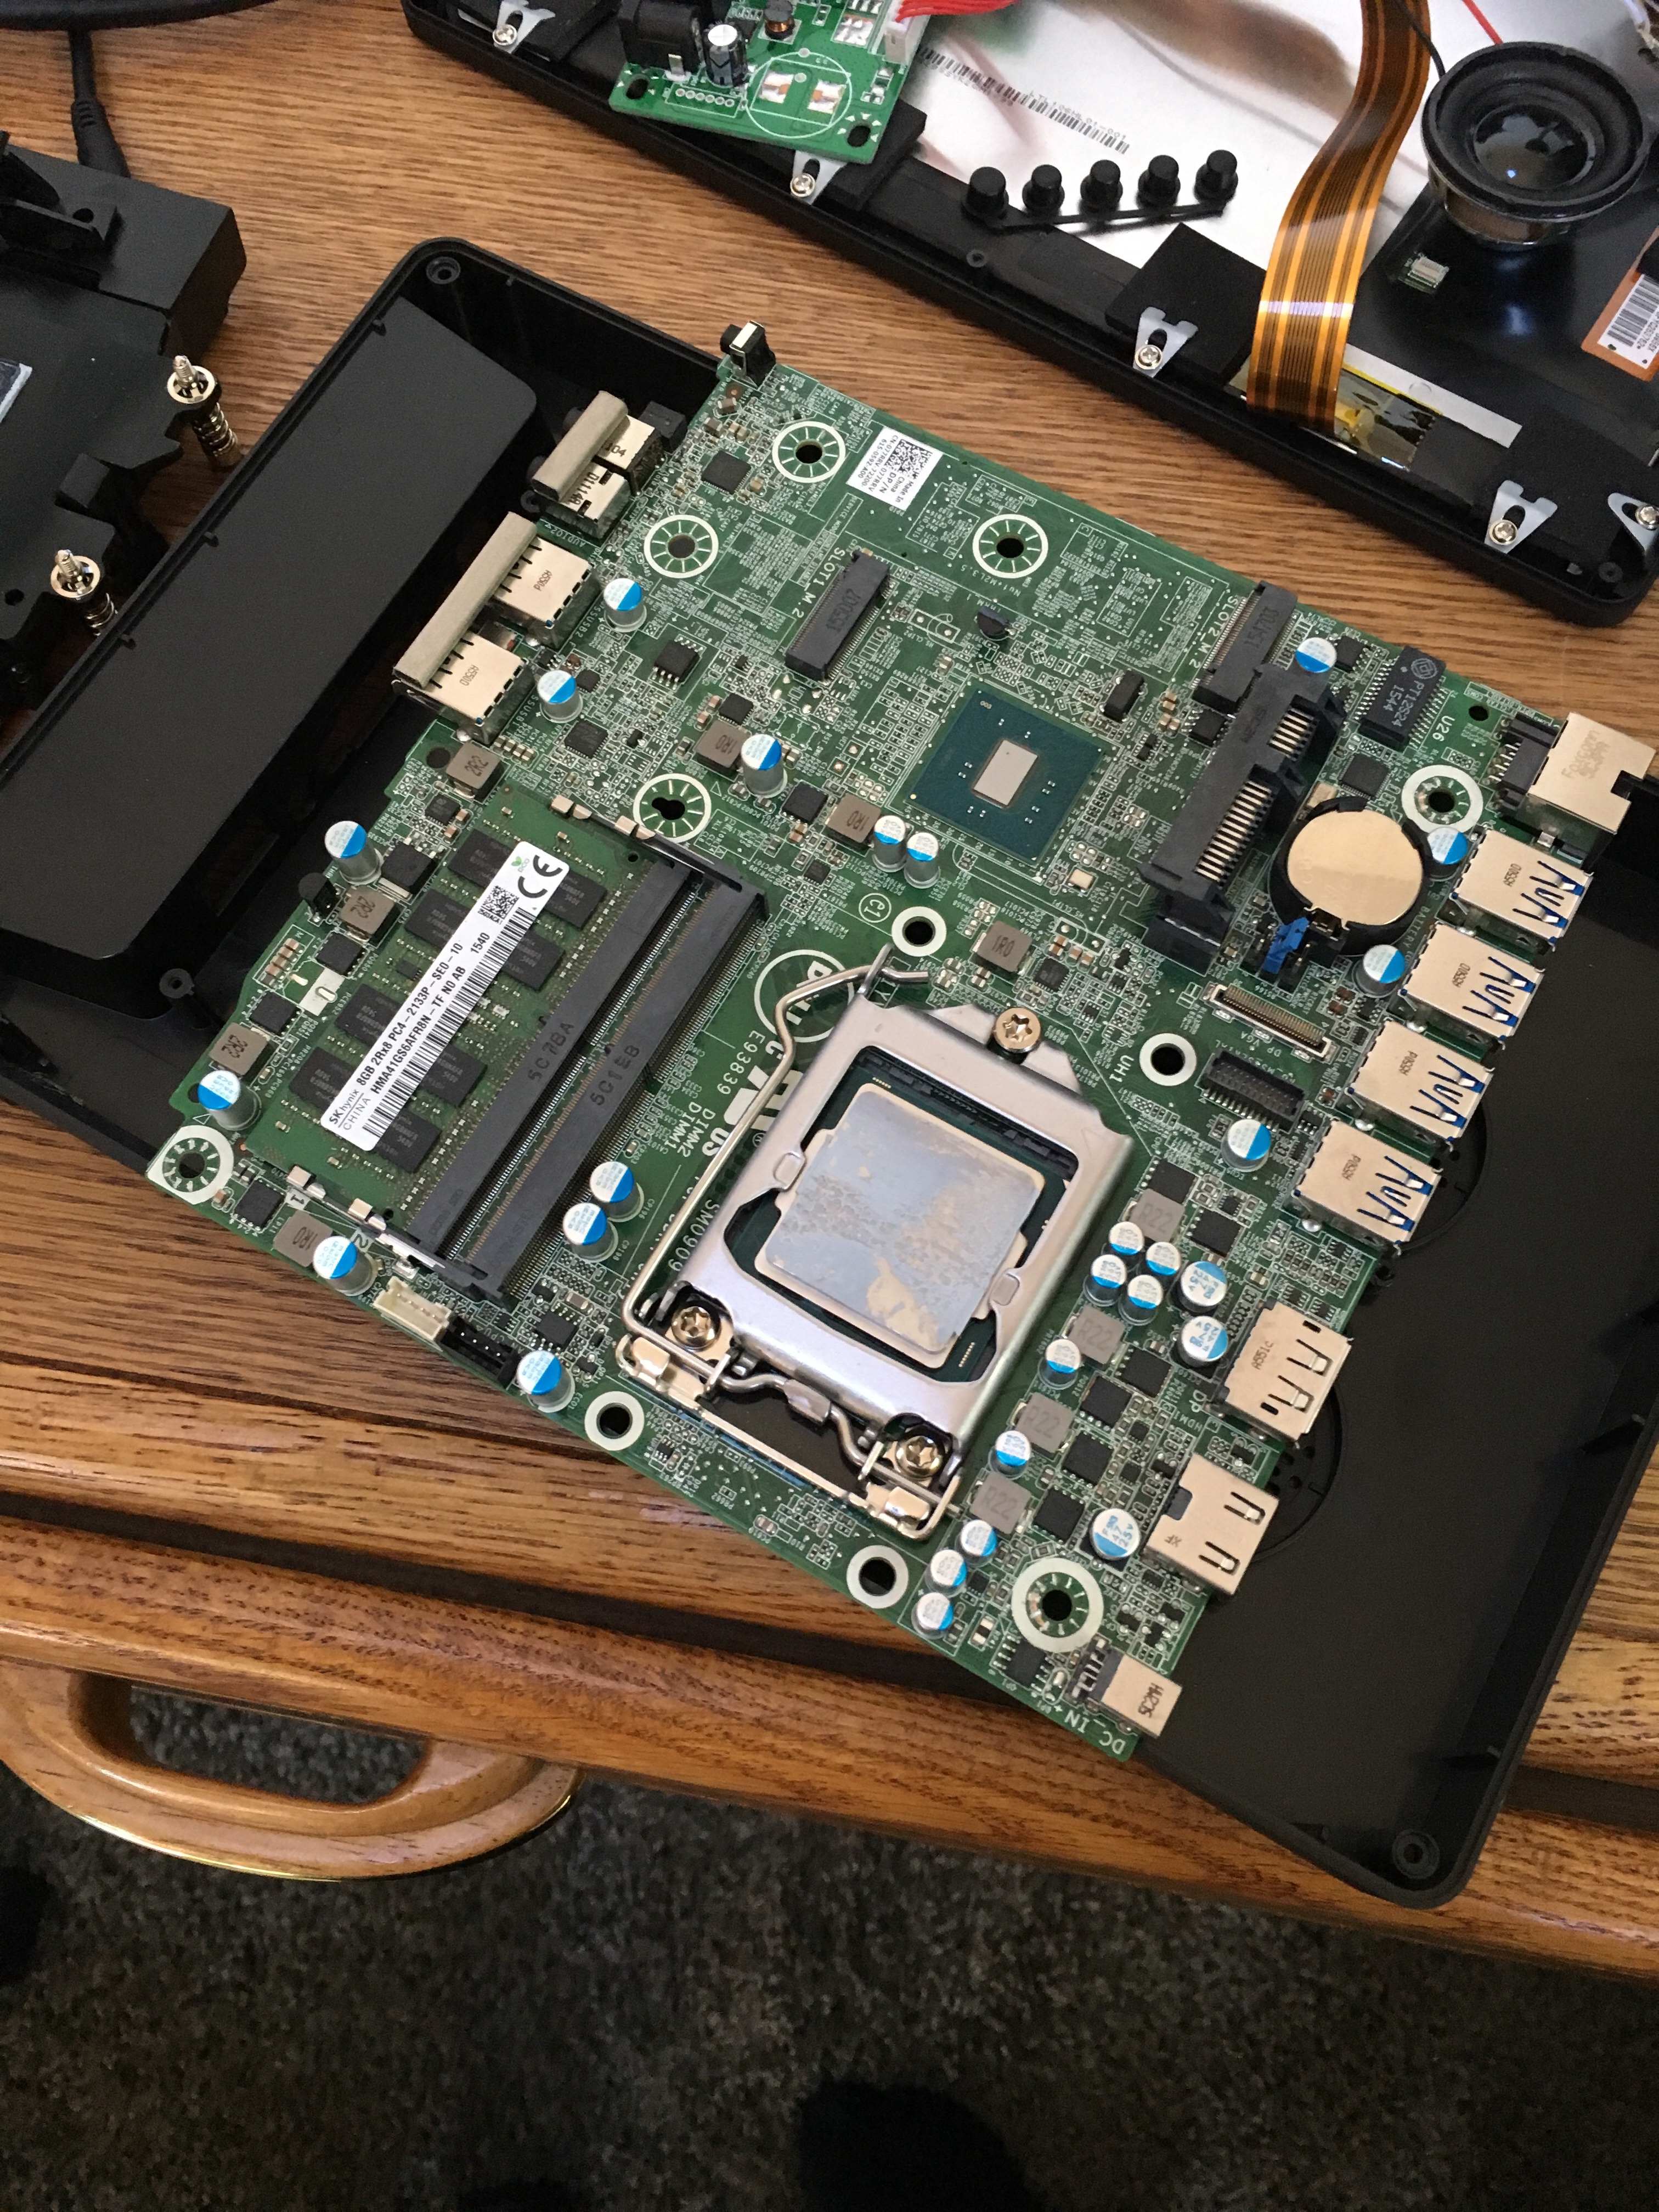
On top of that, my friend noticed that the mount plate (that piece of metal that the motherboard screws into) was attached to the case with several spot welds. I was confused by how this mattered, until he pulled out his drill and started drilling out the weld points. A butter knife and some elbow grease later, and the plate was free of the case, and available for us to use. We can now mount the motherboard on one side, and affix it to the case on the other.

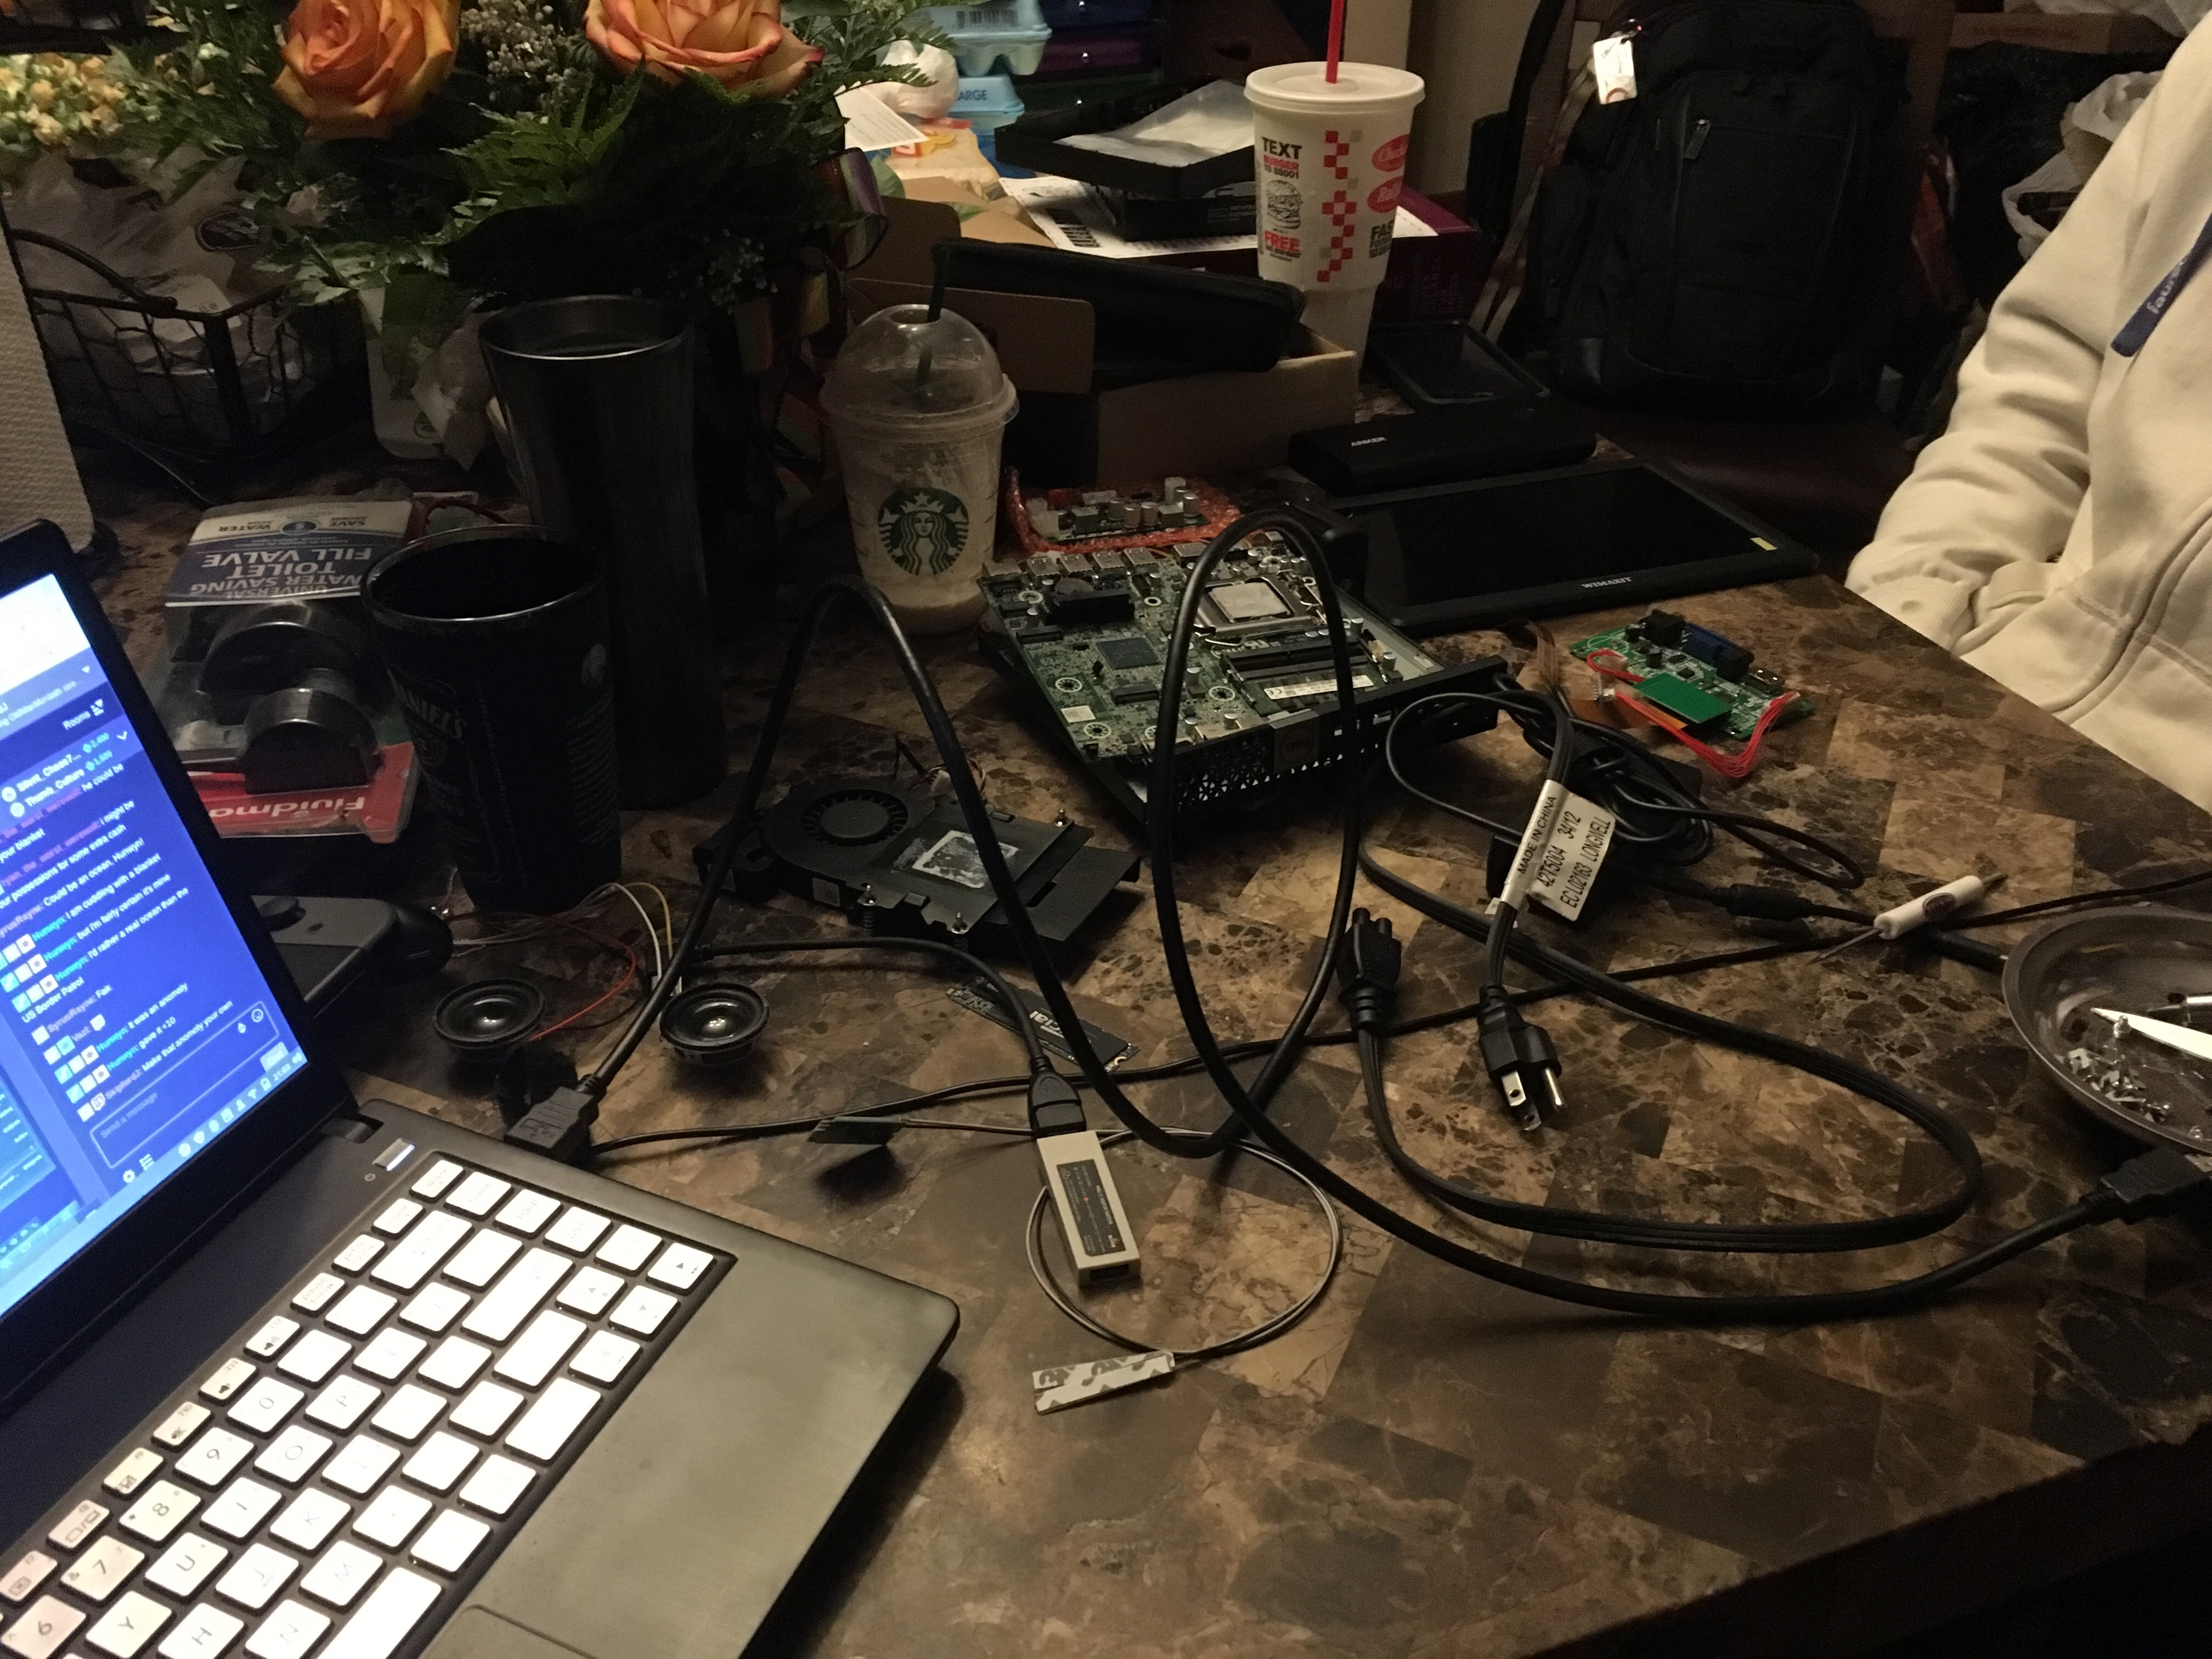
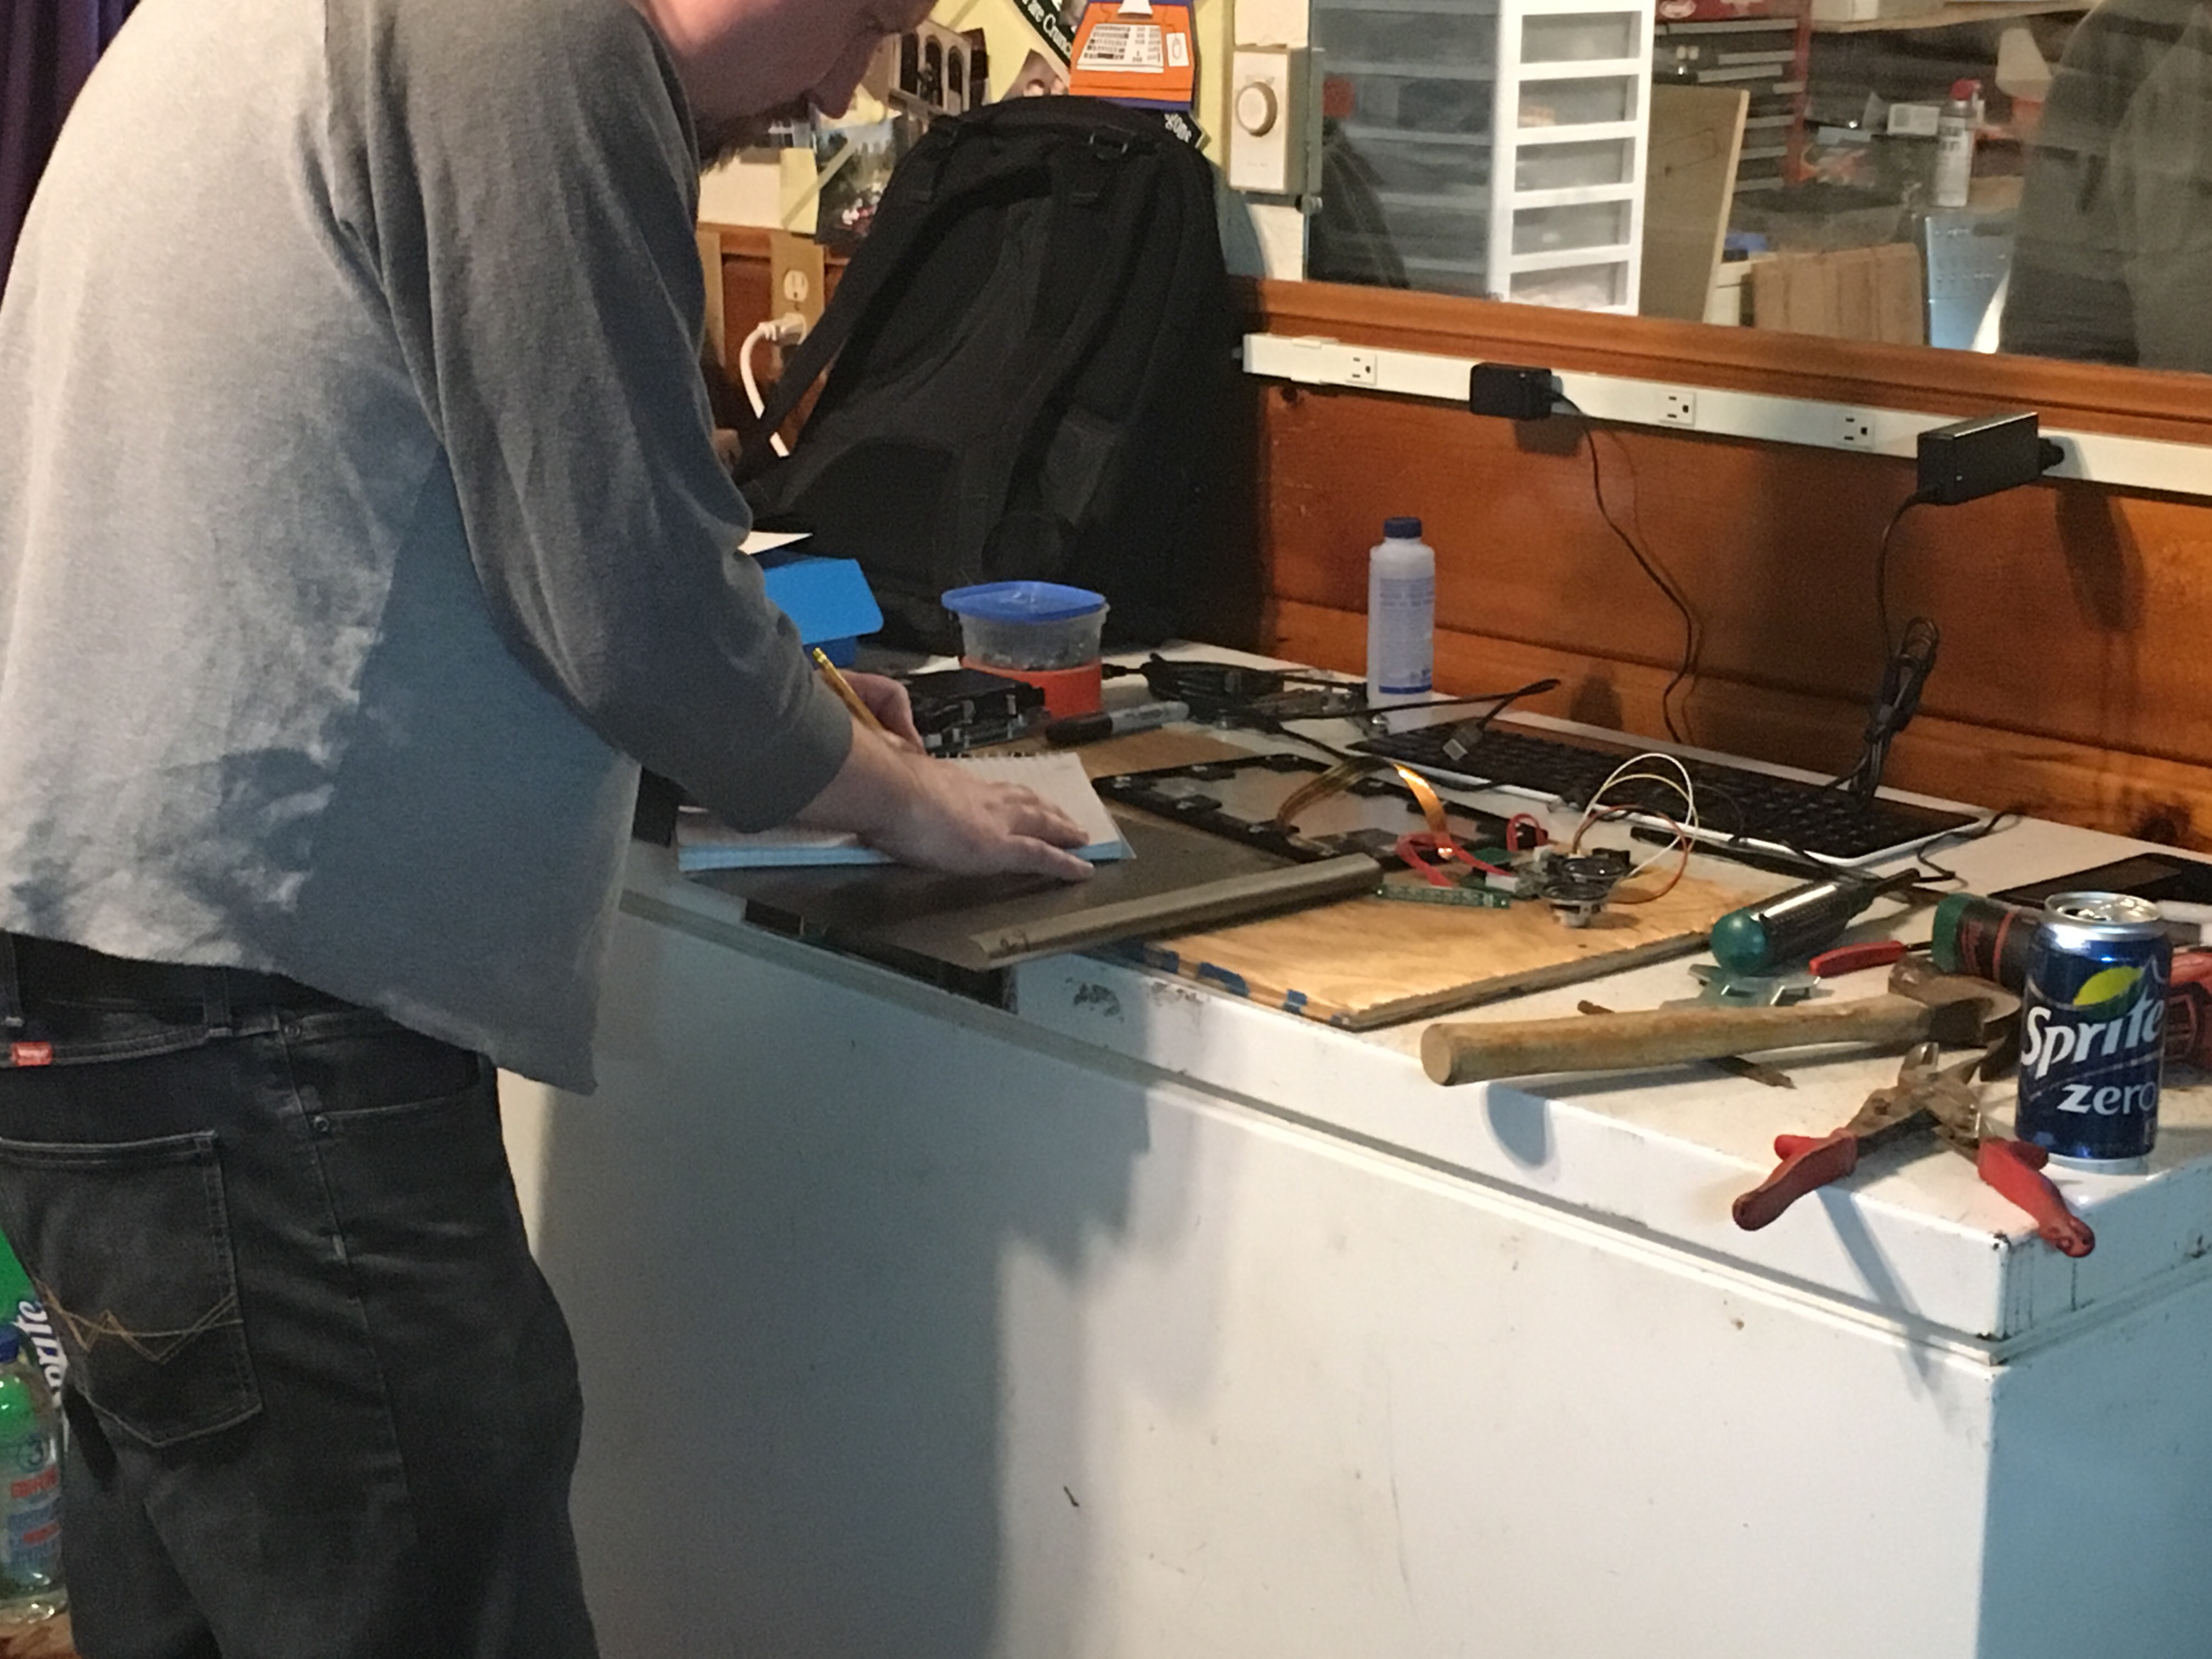
Speaking of cases, my friend and I began considering. And, when he considers, it’s more like he starts mocking it up on the spot. He just happened to have this small sheet of steel lying around, and got right to bending it. So far, the only thing that we disagree on is the speaker placement.

I’m right, of course. :)

Nerding in parallel

Did I promise to give an update if and when I worked on the portable Steambox project again? I did? Well, here you go! We worked on it! And ALSO on something else.

Again, things came down to power. This project needs a battery pack that can power both the screen AND the motherboard, and at different voltages and amperage. We’ve got some bits and bobs that should have done the job, but none quite did All The Things. So, I went back to my thinking at the start of this project, and looked for a consumer battery pack that would do what was needed. And, after an email chat with a representative, I found the Anker PowerCore AC. I picked it up and… didn’t test it. I’d given the power cords to my partner in crime, so to speak, and he was out of the country for work. Well, last week, he came back.

Whatever tells the Anker power pack to increase the amperage to support faster charging isn’t happening with the screen. It’s getting the 5 volts and 100 milliamps, but isn’t getting the quick charge IQ goodness. So, the screen tries to turn on, fails to get enough, and turns off. So, we needed to find a way to check if the battery pack could put out what was advertised.

Tech mess

My friend set up the following power chain: Anker A/C port, router plug, power-over-ethernet injector, RJ45 cable, step-down converter, D/C cord into screen. And it worked! The screen turned on and stayed on! So we know for a fact that the power supply can do the needful, at least out of the A/C port. Now we need to figure out a way to either trigger the battery pack to engage its fast charging, or combine the power from two USB ports to support the screen. We’ll see which way it goes.

Tech mess

The other project is re-purposing an old Dell PowerEdge server into a moderately useful gaming box. It’s currently got one Xeon quad core processor running at about 2.5 GHz, and has a slot for another. It’s got 8 gigs of RAM, and can go up to a whole lot more. My friend had thrown in a 5 year old video card with 1 gig of VRAM, that had sat in its box since he picked it up. It’s got a 500 gig hard drive, but it’s one that came with the server and is a bit slow. Windows 10 runs on it, and runs pretty well, which wasn’t a surprise. It’s done a really good job of scaling down to old hardware since its release, and hasn’t reversed that trend, which I’m thankful for.

Our first test was Minecraft, cranked to full everything, and it ran smooth as butter. Next, we installed Everquest II, a game that the end user (my friend’s wife) plays, and I hadn’t played in about seven years. My login still worked! My characters were still there! I had a succession of “what the crap” moments, and tooled around the winter area in which I spawned, and figured out that anything over “Balanced” graphics quality wasn’t going to be smooth. But! The game worked! For old time’s sake, I let off a PENITENT KICK! and took a photo.

EQ2

Pieces and parts

Pieces and parts

Power can be a problem. I don’t mean the kind where you have too much power, and you get corrupted six ways from Sunday. No, I mean the kind where you need electricity to flow to the pieces and parts in exactly the ways that they expect. And since we’re using consumer parts to build the project, these things aren’t easily modified. But, you know what? This is a problem that can be solved.

We just haven’t been able to solve it yet. The PC takes the majority of the power, which we expected, and the screen takes a comparatively minimal amount. I bought this specific screen model because I saw it powered by USB in this video. Unfortunately, it won’t pull enough power either from a power brick (same brand as the video, but different model) or from a USB cable plugged into a wall wart rated for more than enough juice. I’ve reached out to the maker of the video, but haven’t gotten a reply.

It’s worth noting that the difficulties we’ve run into have had me considering whether or not I should continue the project. And then, at one point, we had the screen on and connected to my laptop, mirroring the display. And, still, that little 10″ screen is beautiful. It’s so pretty. And with that, I was determined all over again to see this thing through to its conclusion.

If you have any ideas or expertise that you’d like to lend to the situation, please contact me with the details you’d need to help with the problem, and I’ll send them your way.

I don’t wanna upgrade.

You read that right. I will be very upset when my iPhone 6S gives up the ghost. I don’t want to change, despite my knowledge that it’s inevitable. Even with battery replacement, its life is finite. And I’m lamenting it now, even though it could be years away.

I grumbled about the non-expandable storage when I switched. I complained about the non-replacable battery (unless I wanted to void the warranty) when I switched. I wasn’t sure how I was going to like iOS and the closed nature of the apps, etc, etc. My 5S was a rock, though. It’s still in use, in the loving care of my brother-in-law. It just worked. Phone calls and text messages just worked. Like, reliably. All the time.

I didn’t have to root it and install an alternative OS just to make it do the thing. I was a convert. Not quite a proselytizer, but just shy.

And then came the iPhone 7. My wife got one, and I was not enthused. Removing the 3.5mm jack was a step too far. Now the only physical jack is Apple’s proprietary one. NO THANK YOU. And how long before that is gone? But, you know, that complaint is years old, right? Why post about this now?

Well, another positive of having an iPhone has been Apple’s attitude towards encrypting as much of the end user’s information as possible. In short, they’ve been heavily for it. But now, right around the time that the new iPhones were released (don’t get me started on offering the 8 and the X at the same time and the even more confusing new naming scheme and ARGH), Apple wants to use my phone and texting metadata for creating a trust score.

No! That’s a bad Apple! *thwacks with rolled-up newspaper*

And when I upgraded to iOS 12, I agreed to this in the EULA/ToS. Great.

Did I mention that the XR is US$1,700? No?

So, do I want to switch back to Android? Hell no. Alphabet/Google is way worse about how it treats your data. Even if I wanted a vanilla Android, I wouldn’t be able to get it with a 3.5mm jack, a replaceable battery, and expandable storage. That combination just isn’t a thing.

Or is it? Enter the Fairphone 2. It does all of these things. ALL of them. And it’s €529 (US$621)! Oh, and if I don’t want to deal with Alphabet/Google? It runs Ubuntu Touch. Which has been resurrected by UBports, and is once again in full and active development!

What’s the catch? Why am I afraid to upgrade if this sweet thing is out there? Well, it’s only sold in and shipped to Europe. The Fairphone 2 is not available in the States at all. Cue the sad trombone.

Maybe, just maybe, when my rock solid iPhone 6S finally dies, they’ll be available here. A Skippy can hope.

Tie Fighter LEGO Set

LEGO Tie Fighter in the box

When your wife takes the kids to the Lego Land store, and then asks you if you want anything, what do you say? You say yes, Ray!

There was an X-Wing, a Republic tank, Anakin’s fighter from Clone Wars, a Jakku jumper, and a bunch of others. They were all nice, but nothing was really jumping out at me. I whined offhandedly about really wanting a TIE fighter, and my lovely wife brought THIS gloriousness home for me.

Partially assembled LEGO Tie Fighter

Now, on its own, this toy is intrinsically cool. On top of that, I was at a snapping point with both home and work stress. Having something to build while I did other things was a near-perfect channel for all of that frustration and angst. I spent two days following the three sets of instructions, and only worried a little about the few extra parts left over. Apparently, that’s just a thing Lego does now.

Finished LEGO Tie Fighter

The level of detail and layered coloring struck me at every stage of the build process. I’m pretty sure that there are details that, if it remains intact, will never see the light of day. And, like Lego sets throughout the decades, this one had me questioning how it was going to end up looking like the picture on the box when all was said and done.

But, like all of them, it did. And I love it.

Long-awaited update

A physical mock-up of the hand held steam box project.

There’s this thing called a mock-up. My good friend had to explain this to me, because I was entirely unfamiliar with this stage of the prototyping process. A mock-up is where you arrange the parts, or bits that represent the parts, close to how they’ll be on the final product.

Why? Well, this way you can make an effort to predict how the details will come together. You can see where there will be room for air flow, test different orientations of the motherboard, and where the ports will be exposed, things like that. In fact, we did that very thing, and made an unexpected decision in the process.

We decided to make it wider.

With the weight of the batteries, we were a little bit worried about holding the device up by the joy-con rails. We didn’t want the mounting screws pulling out, or damaging the joy-cons themselves. Also, they’re small, especially in relation to the rest of the device. If we slightly angle the battery packs underneath them, we provide a better grip and more leverage to hold the device. (If you look at the photo, the mock-up is looking at the back, with the screen down.) We tried to make the angle similar to the angles used in the charging grip. Why waste Nintendo’s R&D?

This made the device a bit wider, but the angle of my arms now feels far more comfortable. I did think about another drawback, though. During charging, the battery packs may warm up to create sweaty palms on the grips. We’ll have to test that once we actually form the grips, and use real battery packs, rather than dead ones.

Full disclosure – due to travel on both of our parts, as well as home repairs, the project has stalled a bit. BY NO MEANS has it stopped. I’m still excited about this and still want to make this a reality.

Off by THIS much!

With everything else tested and taken care of, it was time to look at housing. What about the battery, you ask? My good friend (remember him?) is working on the battery pack, I reply, and I’m not intending on getting in his way. So, housing it is.

Getting the screen apart was pretty easy. Five or six screws, one behind a Quality Control / Void Your Warranty sticker, and it just slid apart. There was plenty of room in there, and everything was placed in a logical way with standard screws and such. Easy to move around, easy to play with.

Getting the PC apart was a little less easy. I had to take out the wireless card and antennas, the hard drive, the fan and air tunnel unit, and the CPU heat sink. And that was just to get to the screws attaching the board to the case.Once the screws were removed, the motherboard was… reluctant to come out of the case. Once I figured out the proper angles, I was able to extract the board without damaging it. It was touch and go there for a minute, so there were many sighs of relief once it was out.

Then came the moment of truth! I lay the motherboard on top of the screen back to see if it would fit, and… well, you can see the photo above. The board is too big (or the backing is too small) by a matter of millimeters. It wasn’t terribly disappointing, because now we get to make a custom housing for the unit, and make sure both the screws for the screen will fit, but that the screws for the motherboard will ALSO fit. We’ll also get to account for internal wiring, cooling vents, and which ports we want to be accessible.

Originally, the plan was for vacuum-molded plastic or acrylic. My friend sent me a video for a fiberglass tape that he thinks will do a better job. If we make the housing out of tape, I’m never letting anyone forget it. Or, for that matter, living it down.

Small is better than large.

System v3You may notice a few changes to the PC in the photo, there. The project has been humming right along, and a lot has changed. The most obvious change, I think, is the hard drive.

The S-ATA SSD that I had did the job, but it was under the system required space, and took up quite a bit of room. Skippy, you might ask, how can a laptop hard drive take up a lot of room? Okay, that’s fair, I respond, space is definitely relative in this case. As I mentioned in the last post, this motherboard has M.2 slots, one of which I used for the wifi card. I spent a little money and ordered a M.2 hard drive, and it’s ridiculously tiny, despite having 250 gigs on it. It’s the Crucial branded number on the left, there. It’s incredibly fast, was immediately compatible, and generates very little heat. With all of these benefits, it was the way to go when space will be at a premium.

The wifi card looks a little different, too. That’s because I ordered antennas for it! The first antenna I tried to attach was a bust. Apparently, when the standard changed from Mini PCI-E to M.2, they took the opportunity to make the antenna connectors smaller. Incredibly small. I was expecting a struggle after my last attempt to attach antennas, but these clipped right on. AND! They have adhesives on the end for when I run them around the edges of the screen. Bonus!

Also! My Dualshock 4 controller seems to have mysteriously morphed into Nintendo Switch Joy-cons, attached to a Charging Grip. With the wires attached to the wireless card, bluetooth works under SteamOS, and can see the Joy-cons. Unfortunately, it sees each of them as a separate controller, rather than seeing both as one. If you look closely in the back, you may see the Magic-NS adapter sticking out the back. (Thanks to My Mate Vince for this!) When using that, the Joy-cons show up as a single controller that can be easily mapped through Steam’s interface. I played some Bastion and some Talos Principle with them, and was NOT disappointed.

The next step is to take apart the screen and get the motherboard out of its case, determine if we need a custom housing, and move forward from there. SPOOOOOOON!