
 With everything else tested and taken care of, it was time to look at housing. What about the battery, you ask? My good friend (remember him?) is working on the battery pack, I reply, and I’m not intending on getting in his way. So, housing it is.
Getting the screen apart was pretty easy. Five or six screws, one behind a Quality Control / Void Your Warranty sticker, and it just slid apart. There was plenty of room in there, and everything was placed in a logical way with standard screws and such. Easy to move around, easy to play with.
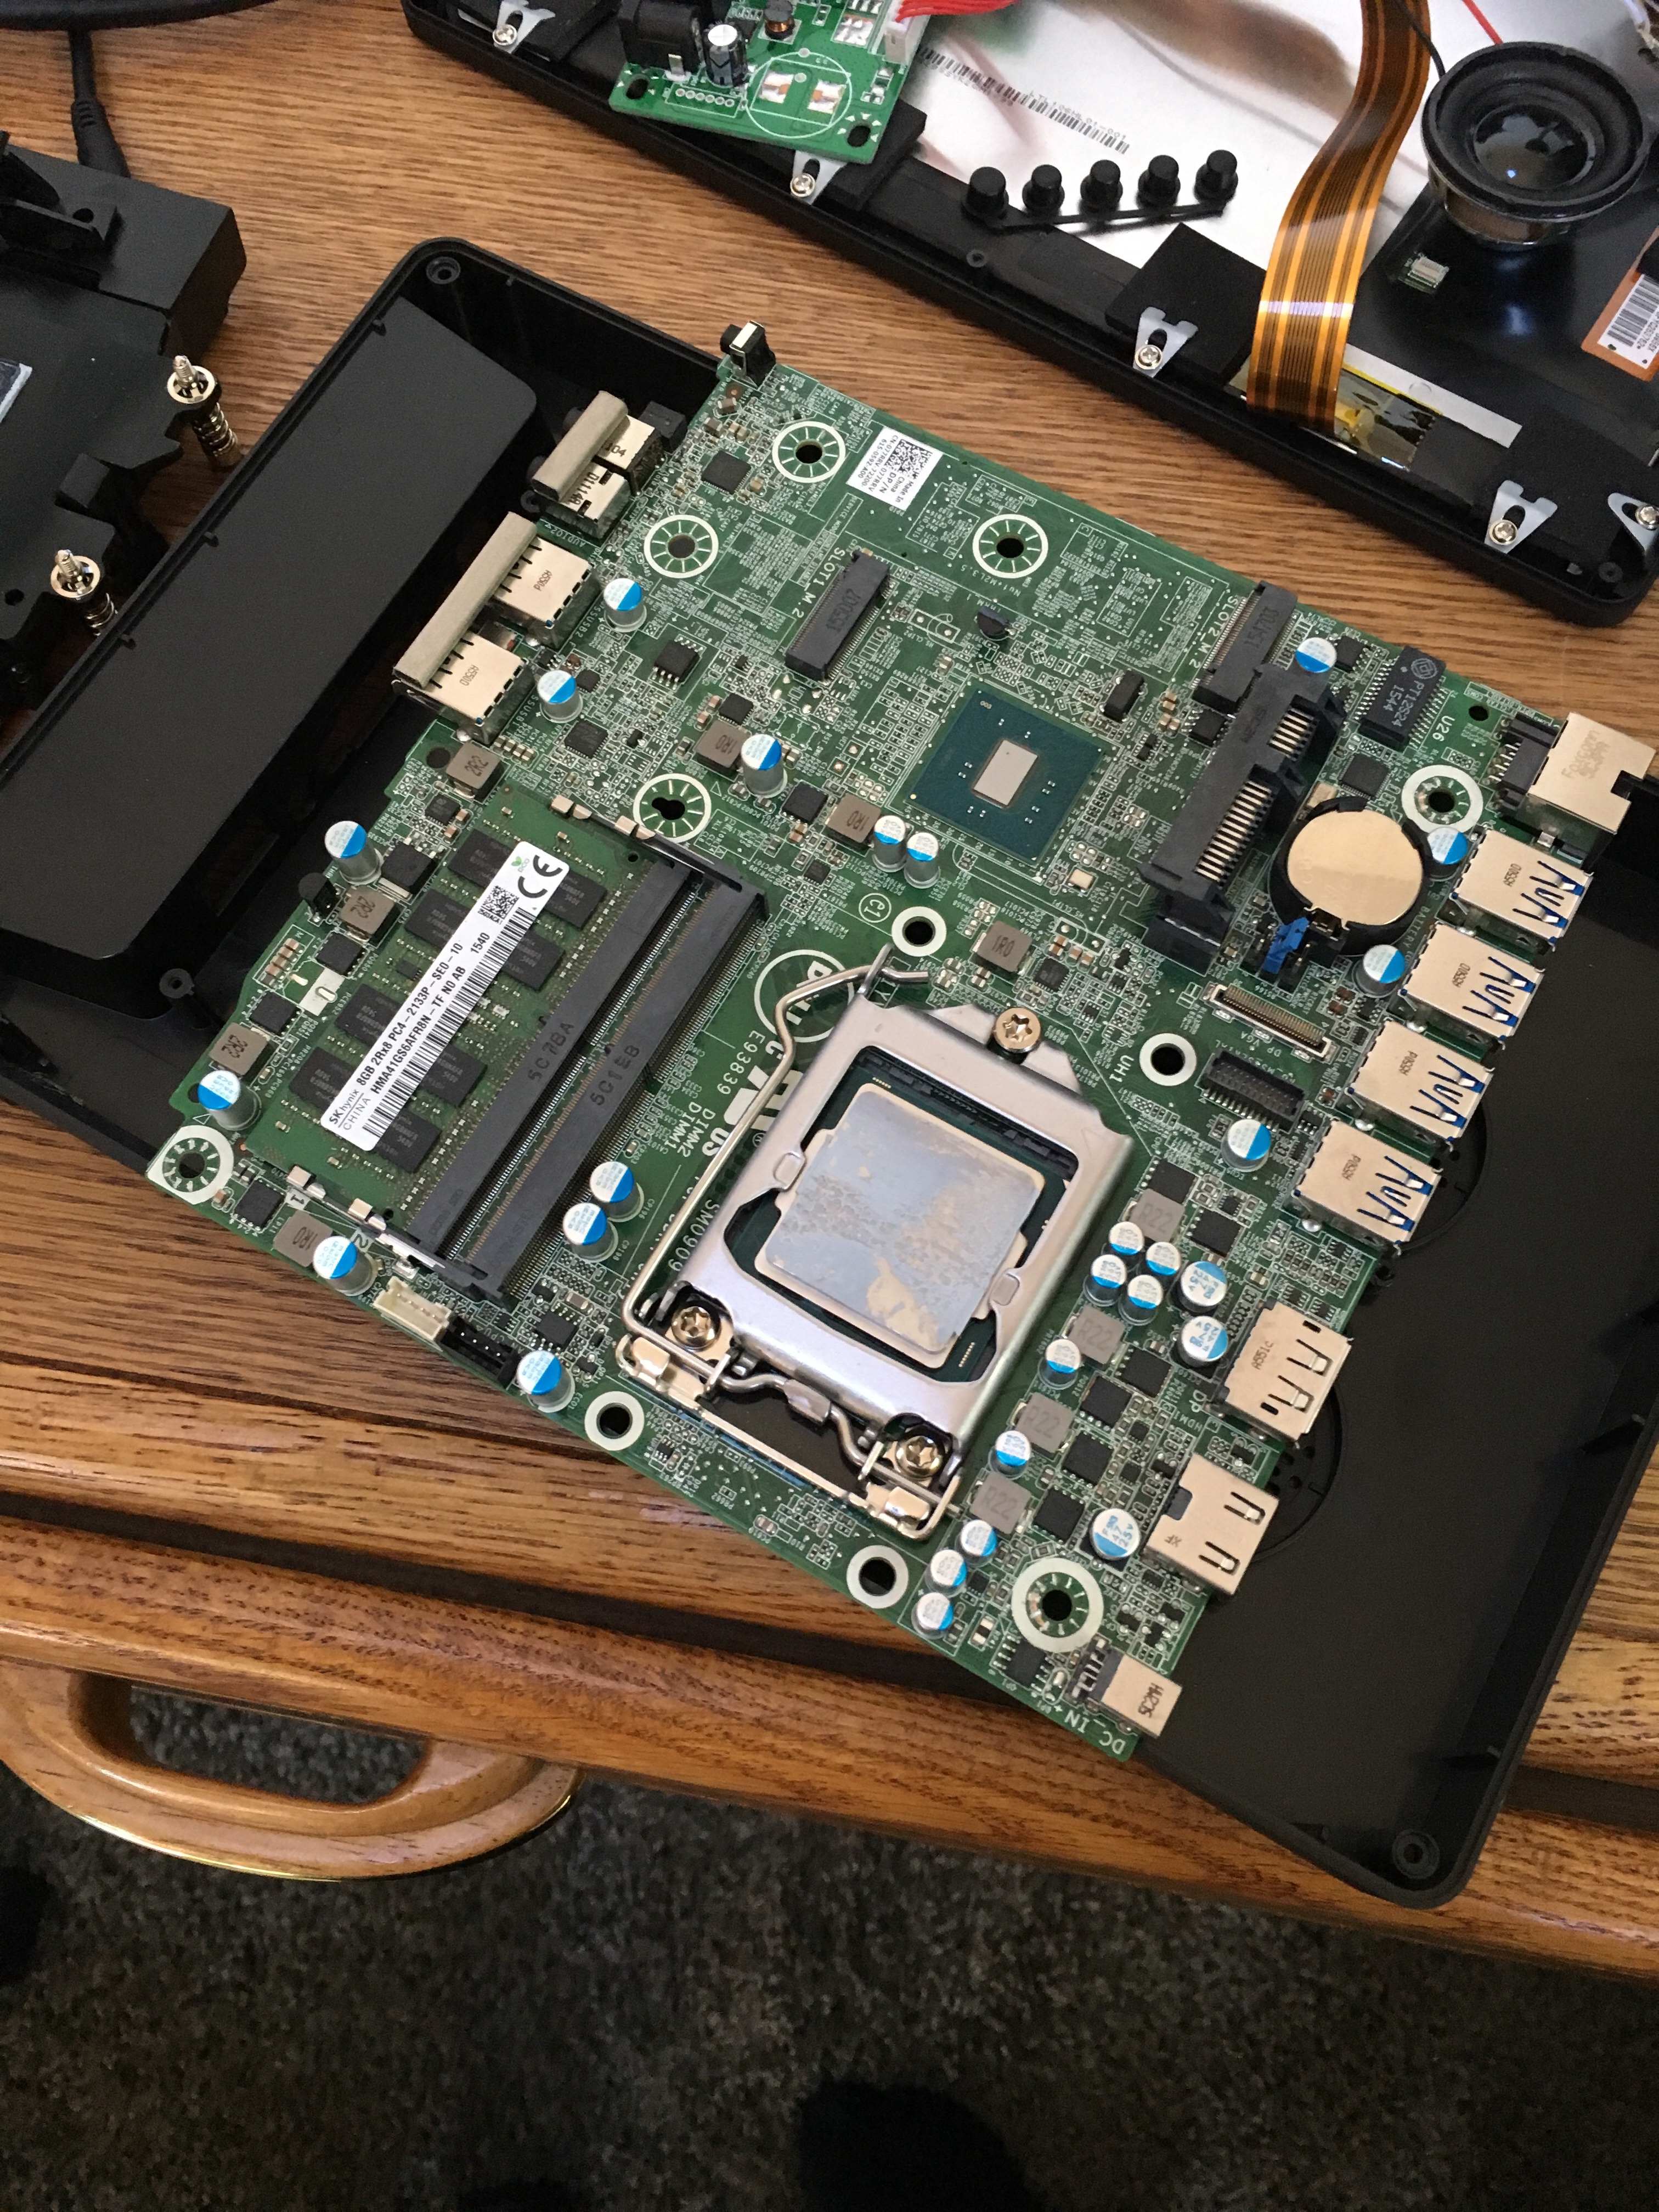
Getting the PC apart was a little less easy. I had to take out the wireless card and antennas, the hard drive, the fan and air tunnel unit, and the CPU heat sink. And that was just to get to the screws attaching the board to the case.Once the screws were removed, the motherboard was… reluctant to come out of the case. Once I figured out the proper angles, I was able to extract the board without damaging it. It was touch and go there for a minute, so there were many sighs of relief once it was out.
Then came the moment of truth! I lay the motherboard on top of the screen back to see if it would fit, and… well, you can see the photo above. The board is too big (or the backing is too small) by a matter of millimeters. It wasn’t terribly disappointing, because now we get to make a custom housing for the unit, and make sure both the screws for the screen will fit, but that the screws for the motherboard will ALSO fit. We’ll also get to account for internal wiring, cooling vents, and which ports we want to be accessible.
Originally, the plan was for vacuum-molded plastic or acrylic. My friend sent me a video for a fiberglass tape that he thinks will do a better job. If we make the housing out of tape, I’m never letting anyone forget it. Or, for that matter, living it down.