Is my PC an Autobot? Not YET.

Autobot symbol stencils

Have you ever wanted to have something custom? Something made so it’s uniquely yours, and different from all other versions of that thing/ Some people customize their cars, or have custom jewelry designed, or have clothes made that are one of a kind. I get this urge every once in a while, but I often ignore it. Not this time.

Spray painted computer case side

This time I went for it. My PC was going to have an Autobot badge on it. Spray painted and messy, like it had been applied hastily in the war with the Decepticons.

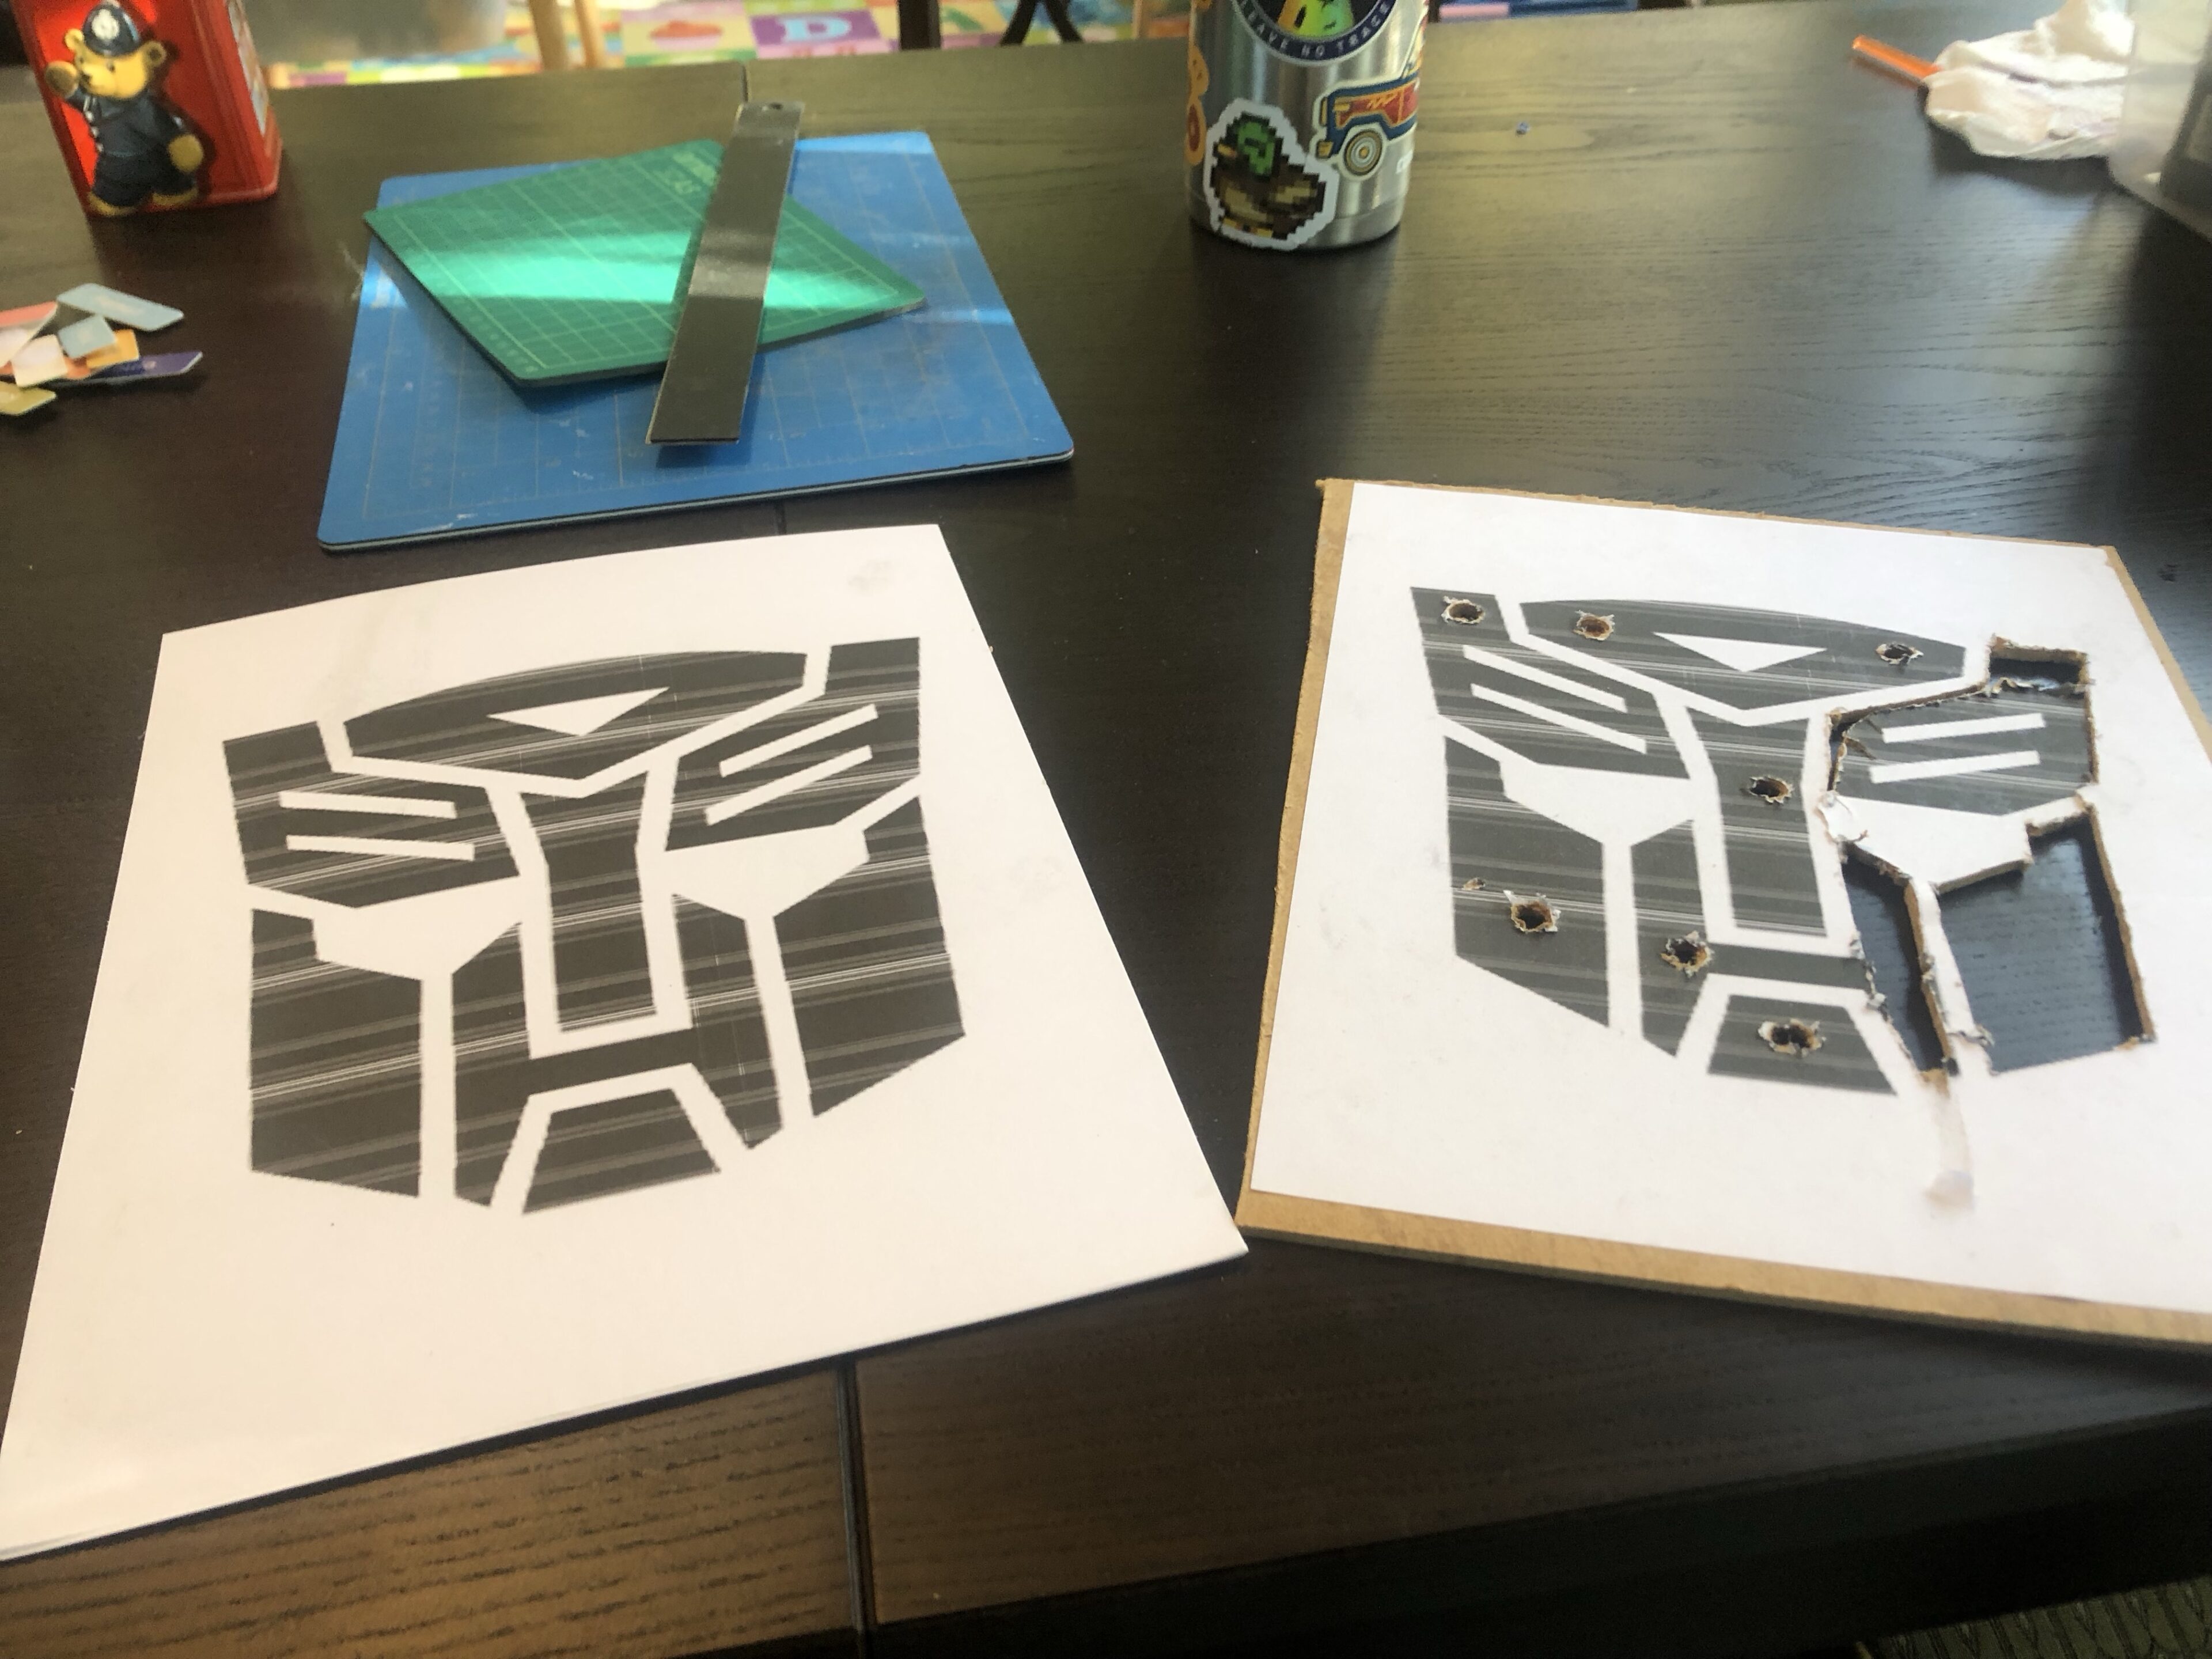
The first step was the stencil. I’d tried making one before, and I’d ended up with some mixed results. So I took a good friend up on his invite to a crafternoon, and set to work. I tried jigsawing through thin wood, but it snapped when one cut got too close to another. Plan B was gluing two sheets of card stock together, then gluing the outline to that. An x-acto knife did the work of making the holes, and the stencil was ready!

Stenciled autobot symbol on a computer case side

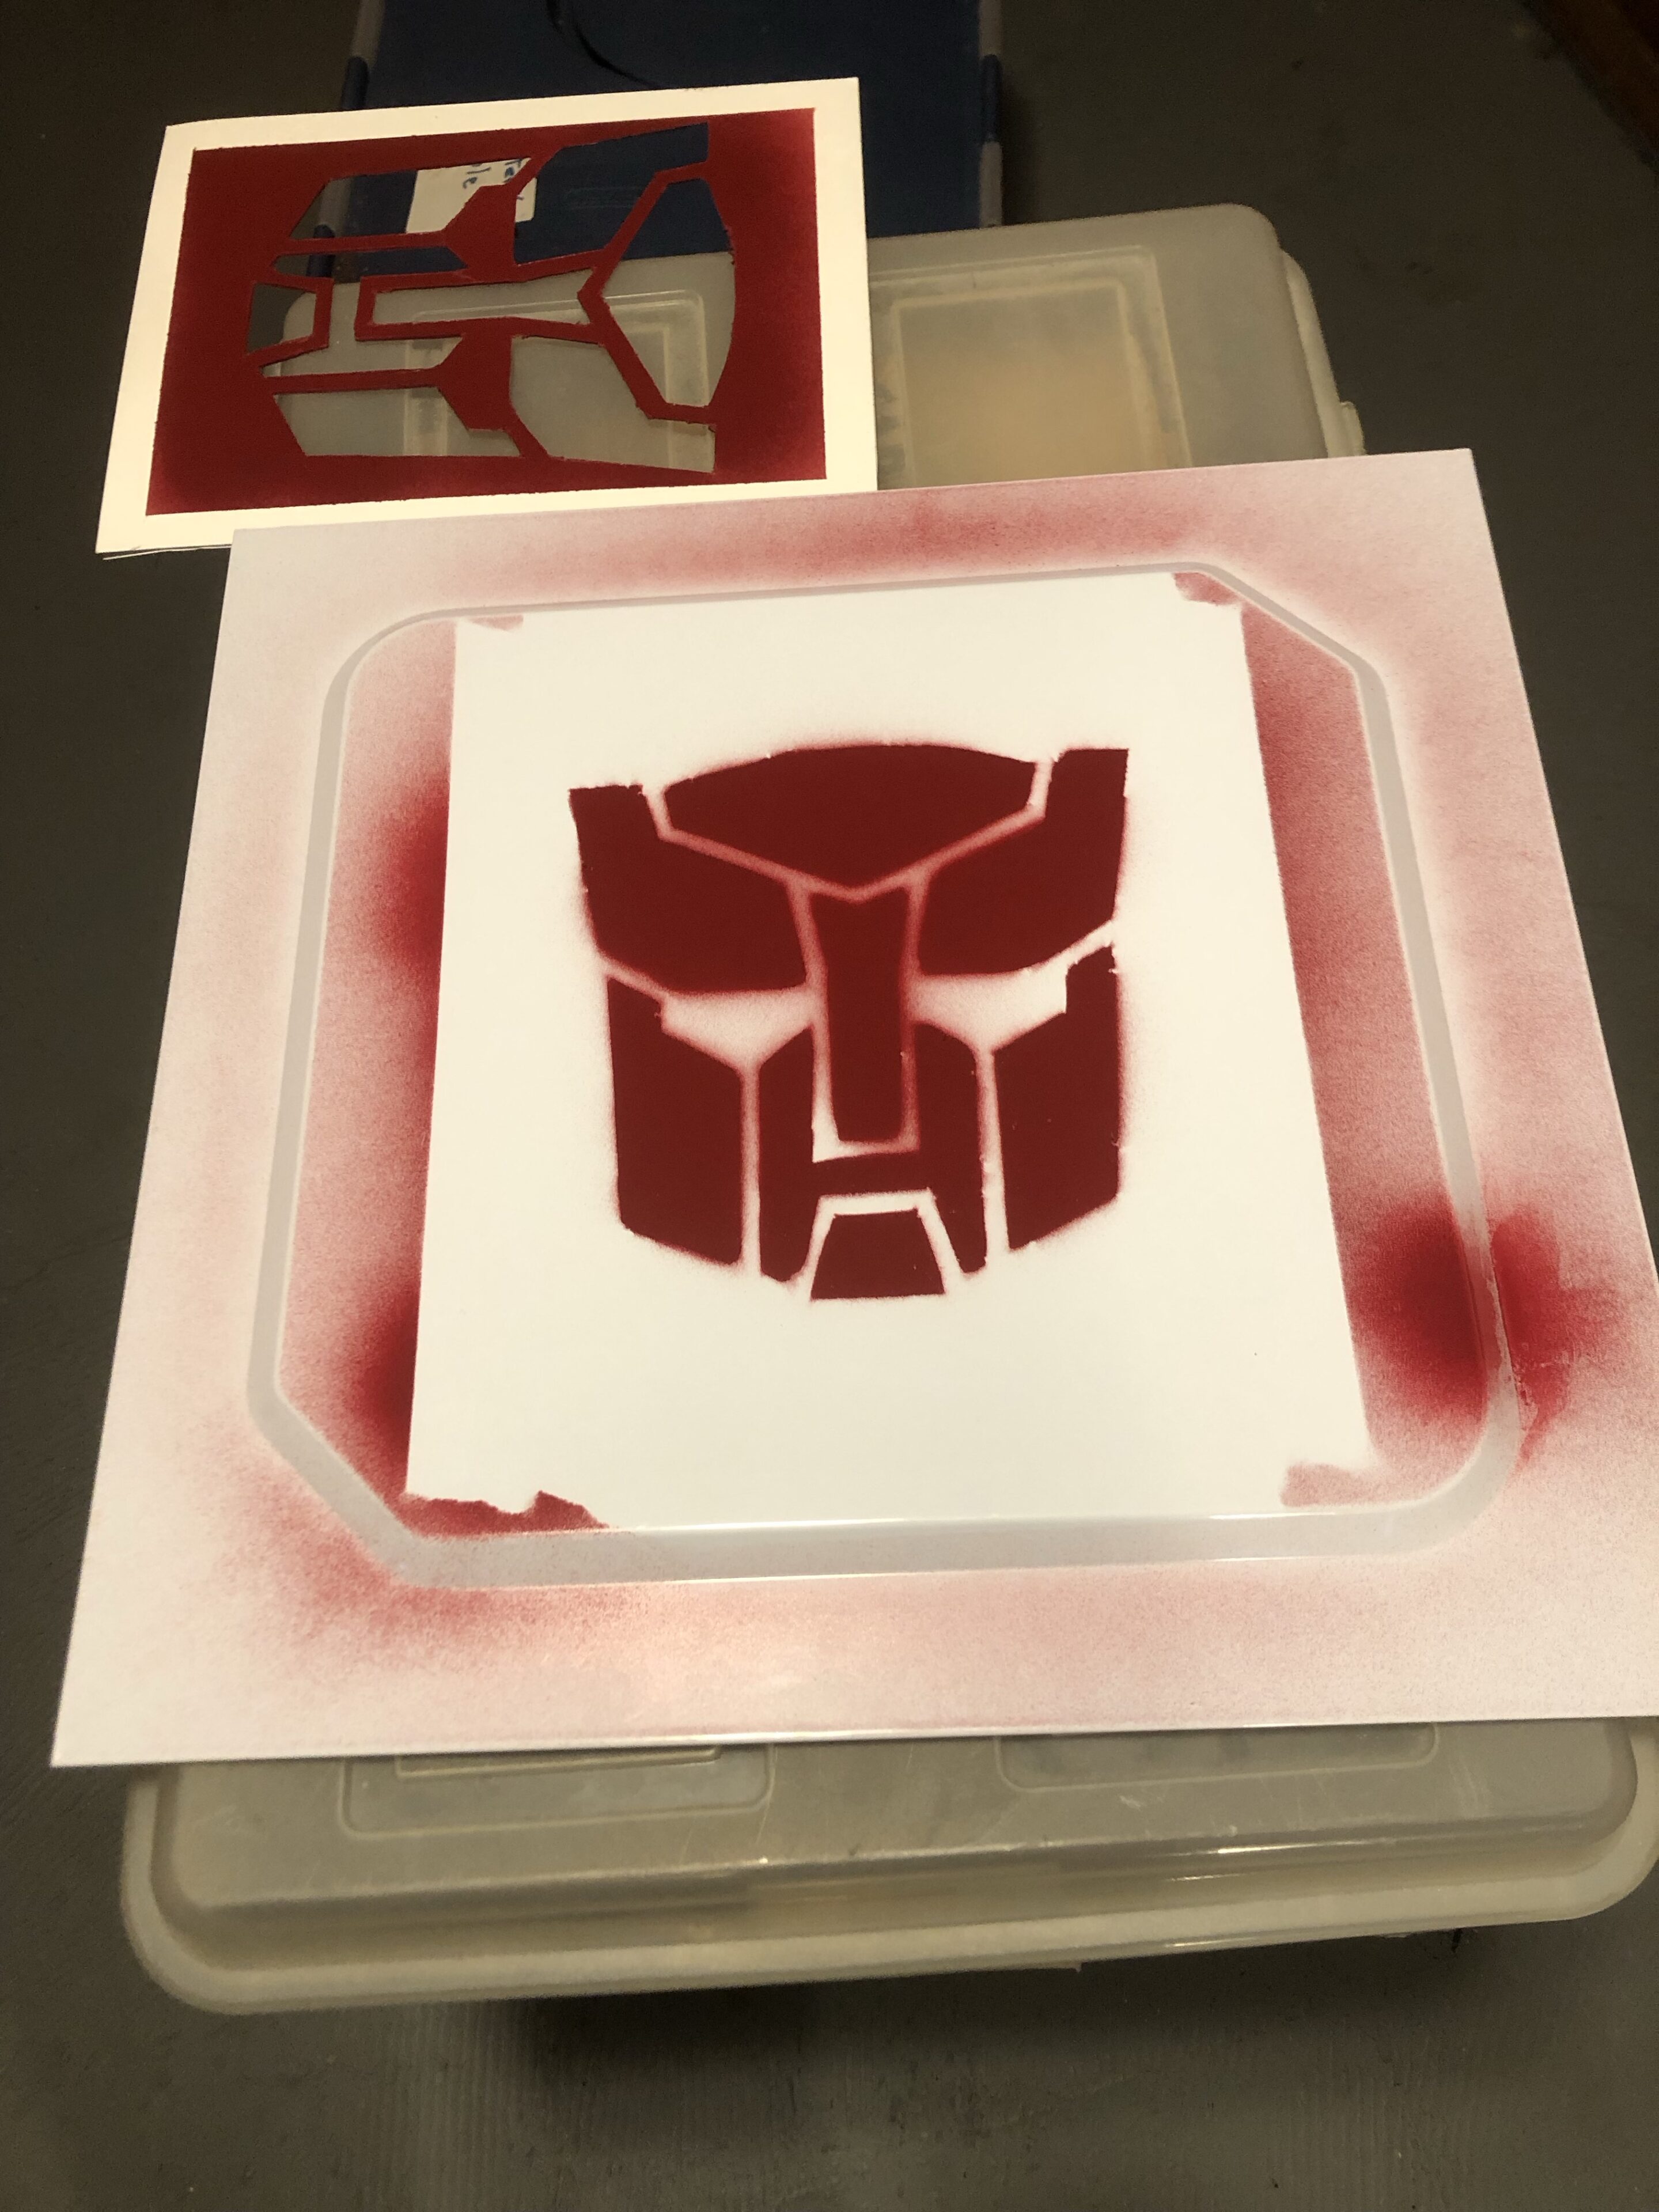
It had been so long since I’d spray painted that I was basically starting over. Wait, had I ever used spray paint before? I had to have. Well, the primer/paint mix worked really, really well. It covered great, and two coats was probably a little too much. I had made one mistake, though, and MonkeyLinkMega saw it right away. I’d left the stencil at 8.5″ x 11″, rather than squaring it up more tightly around the symbol.

Spray painted autobot symbol on computer case side

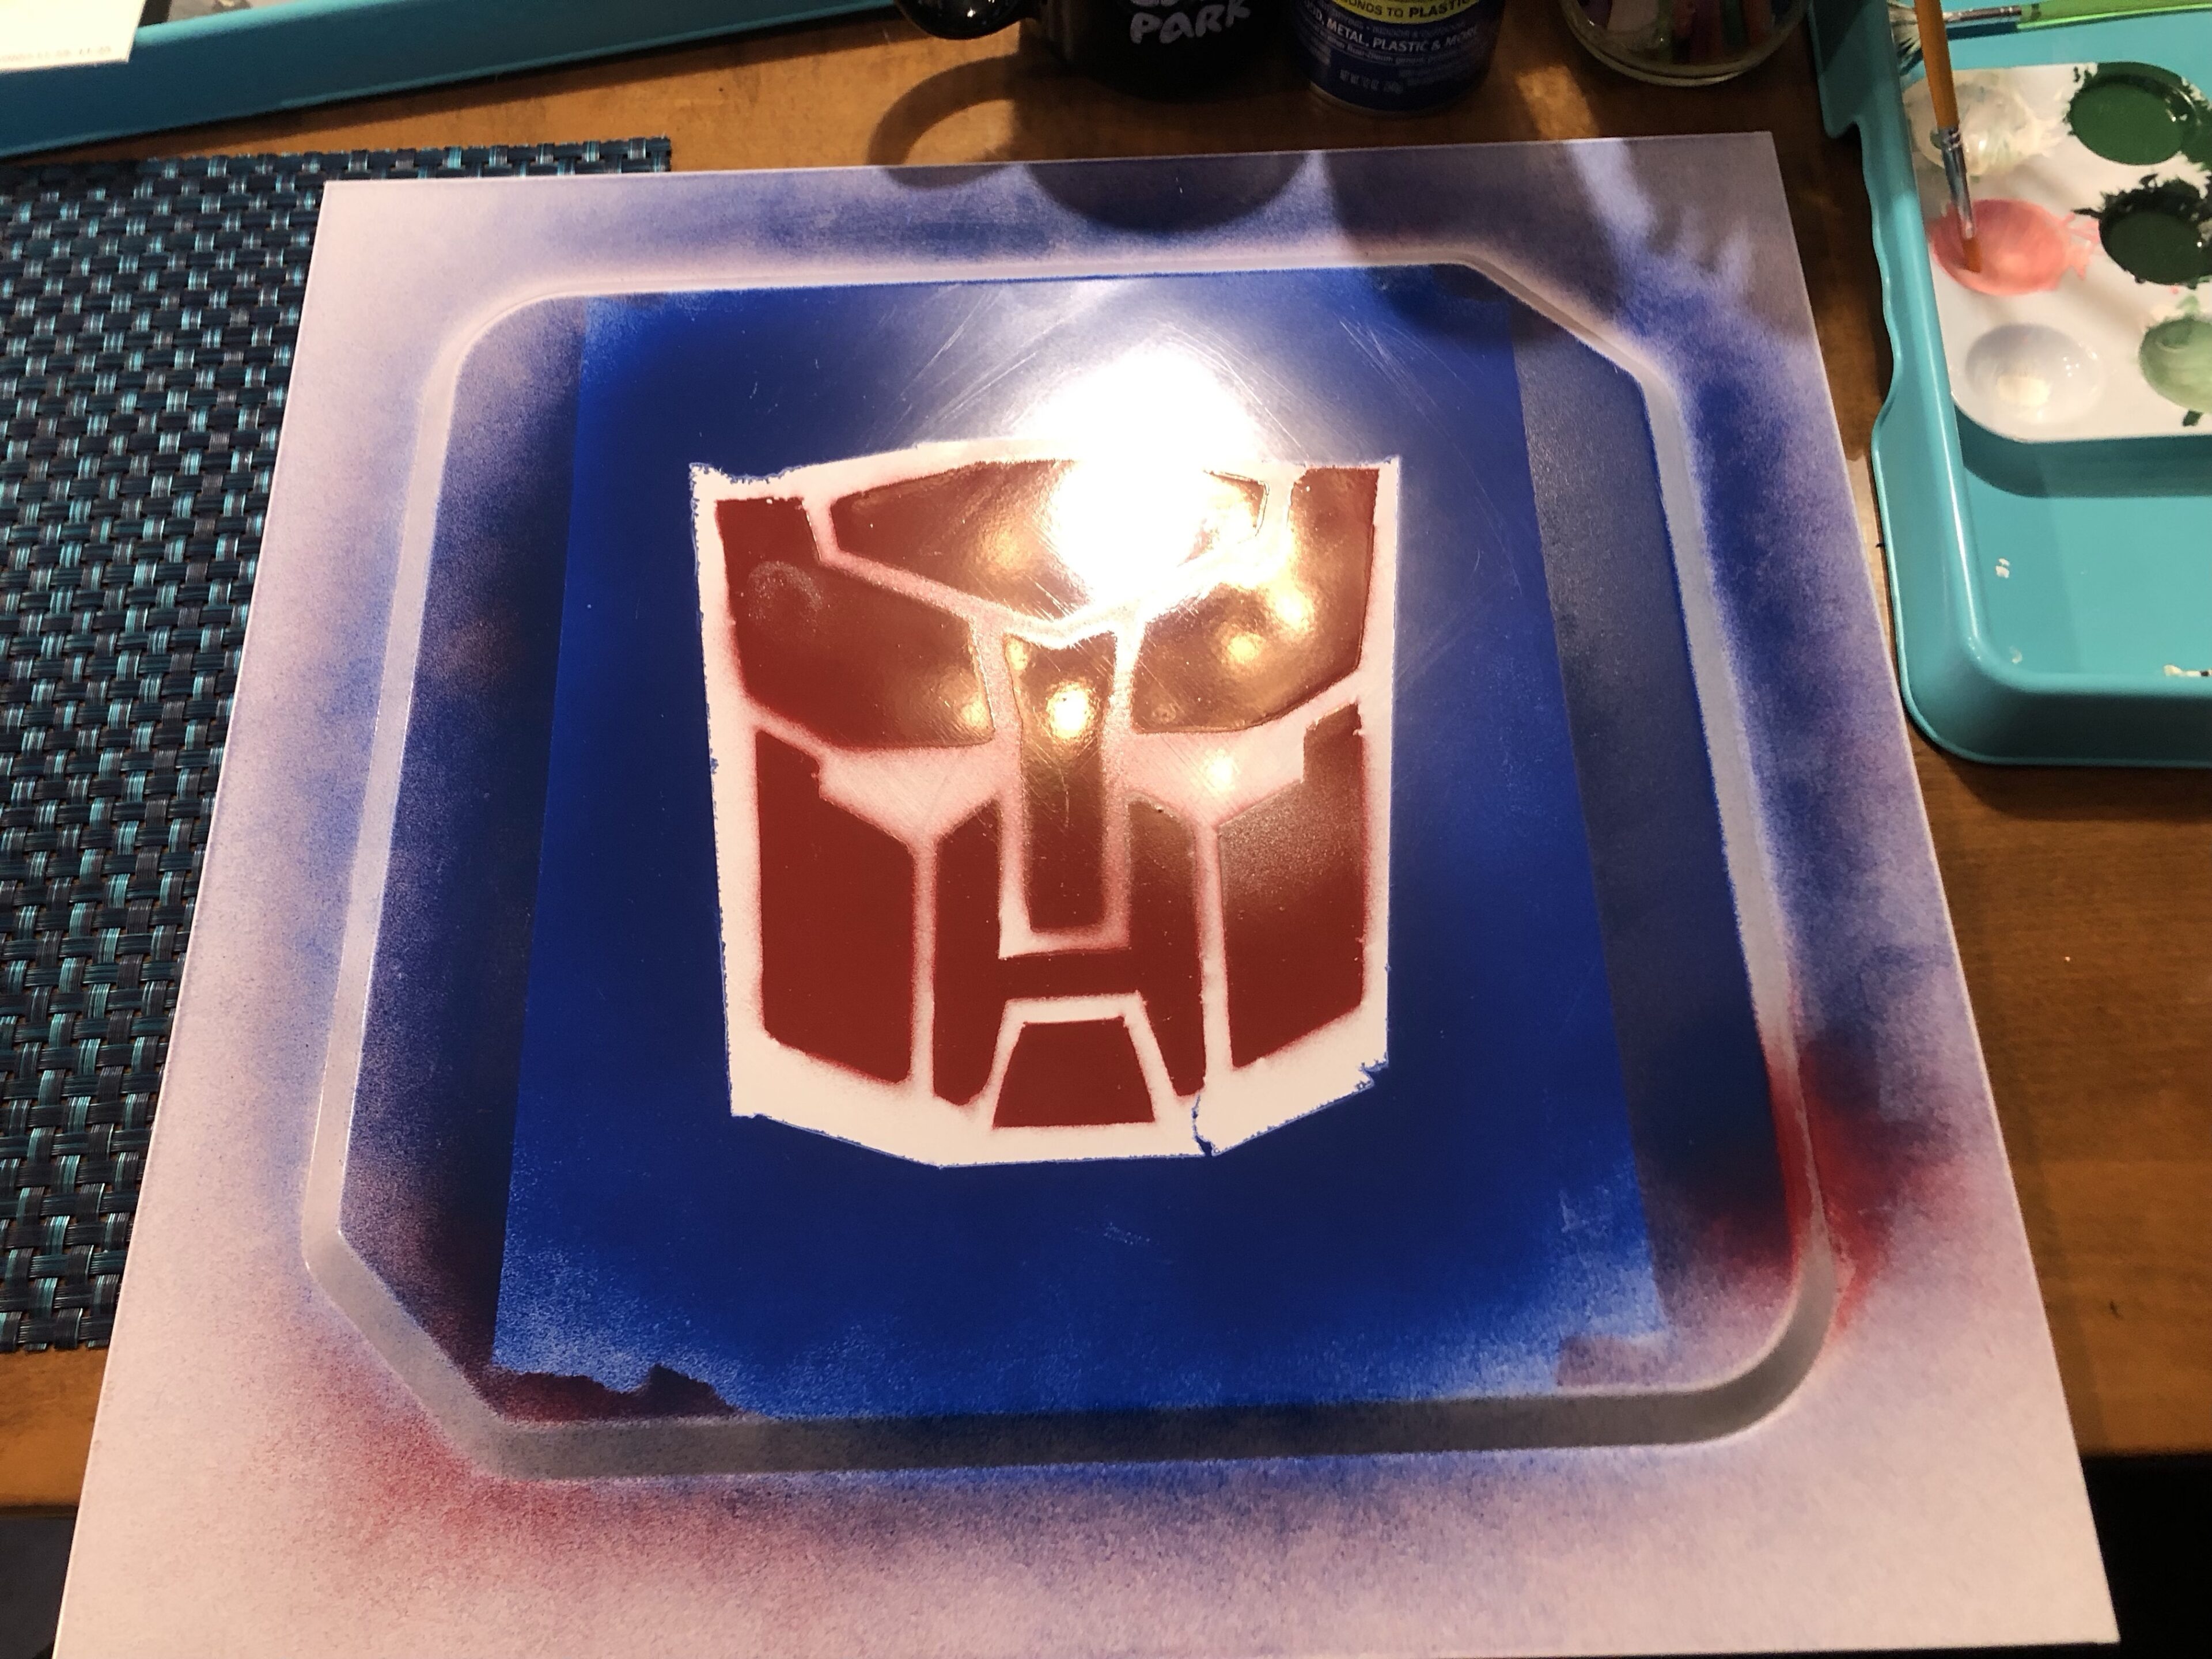
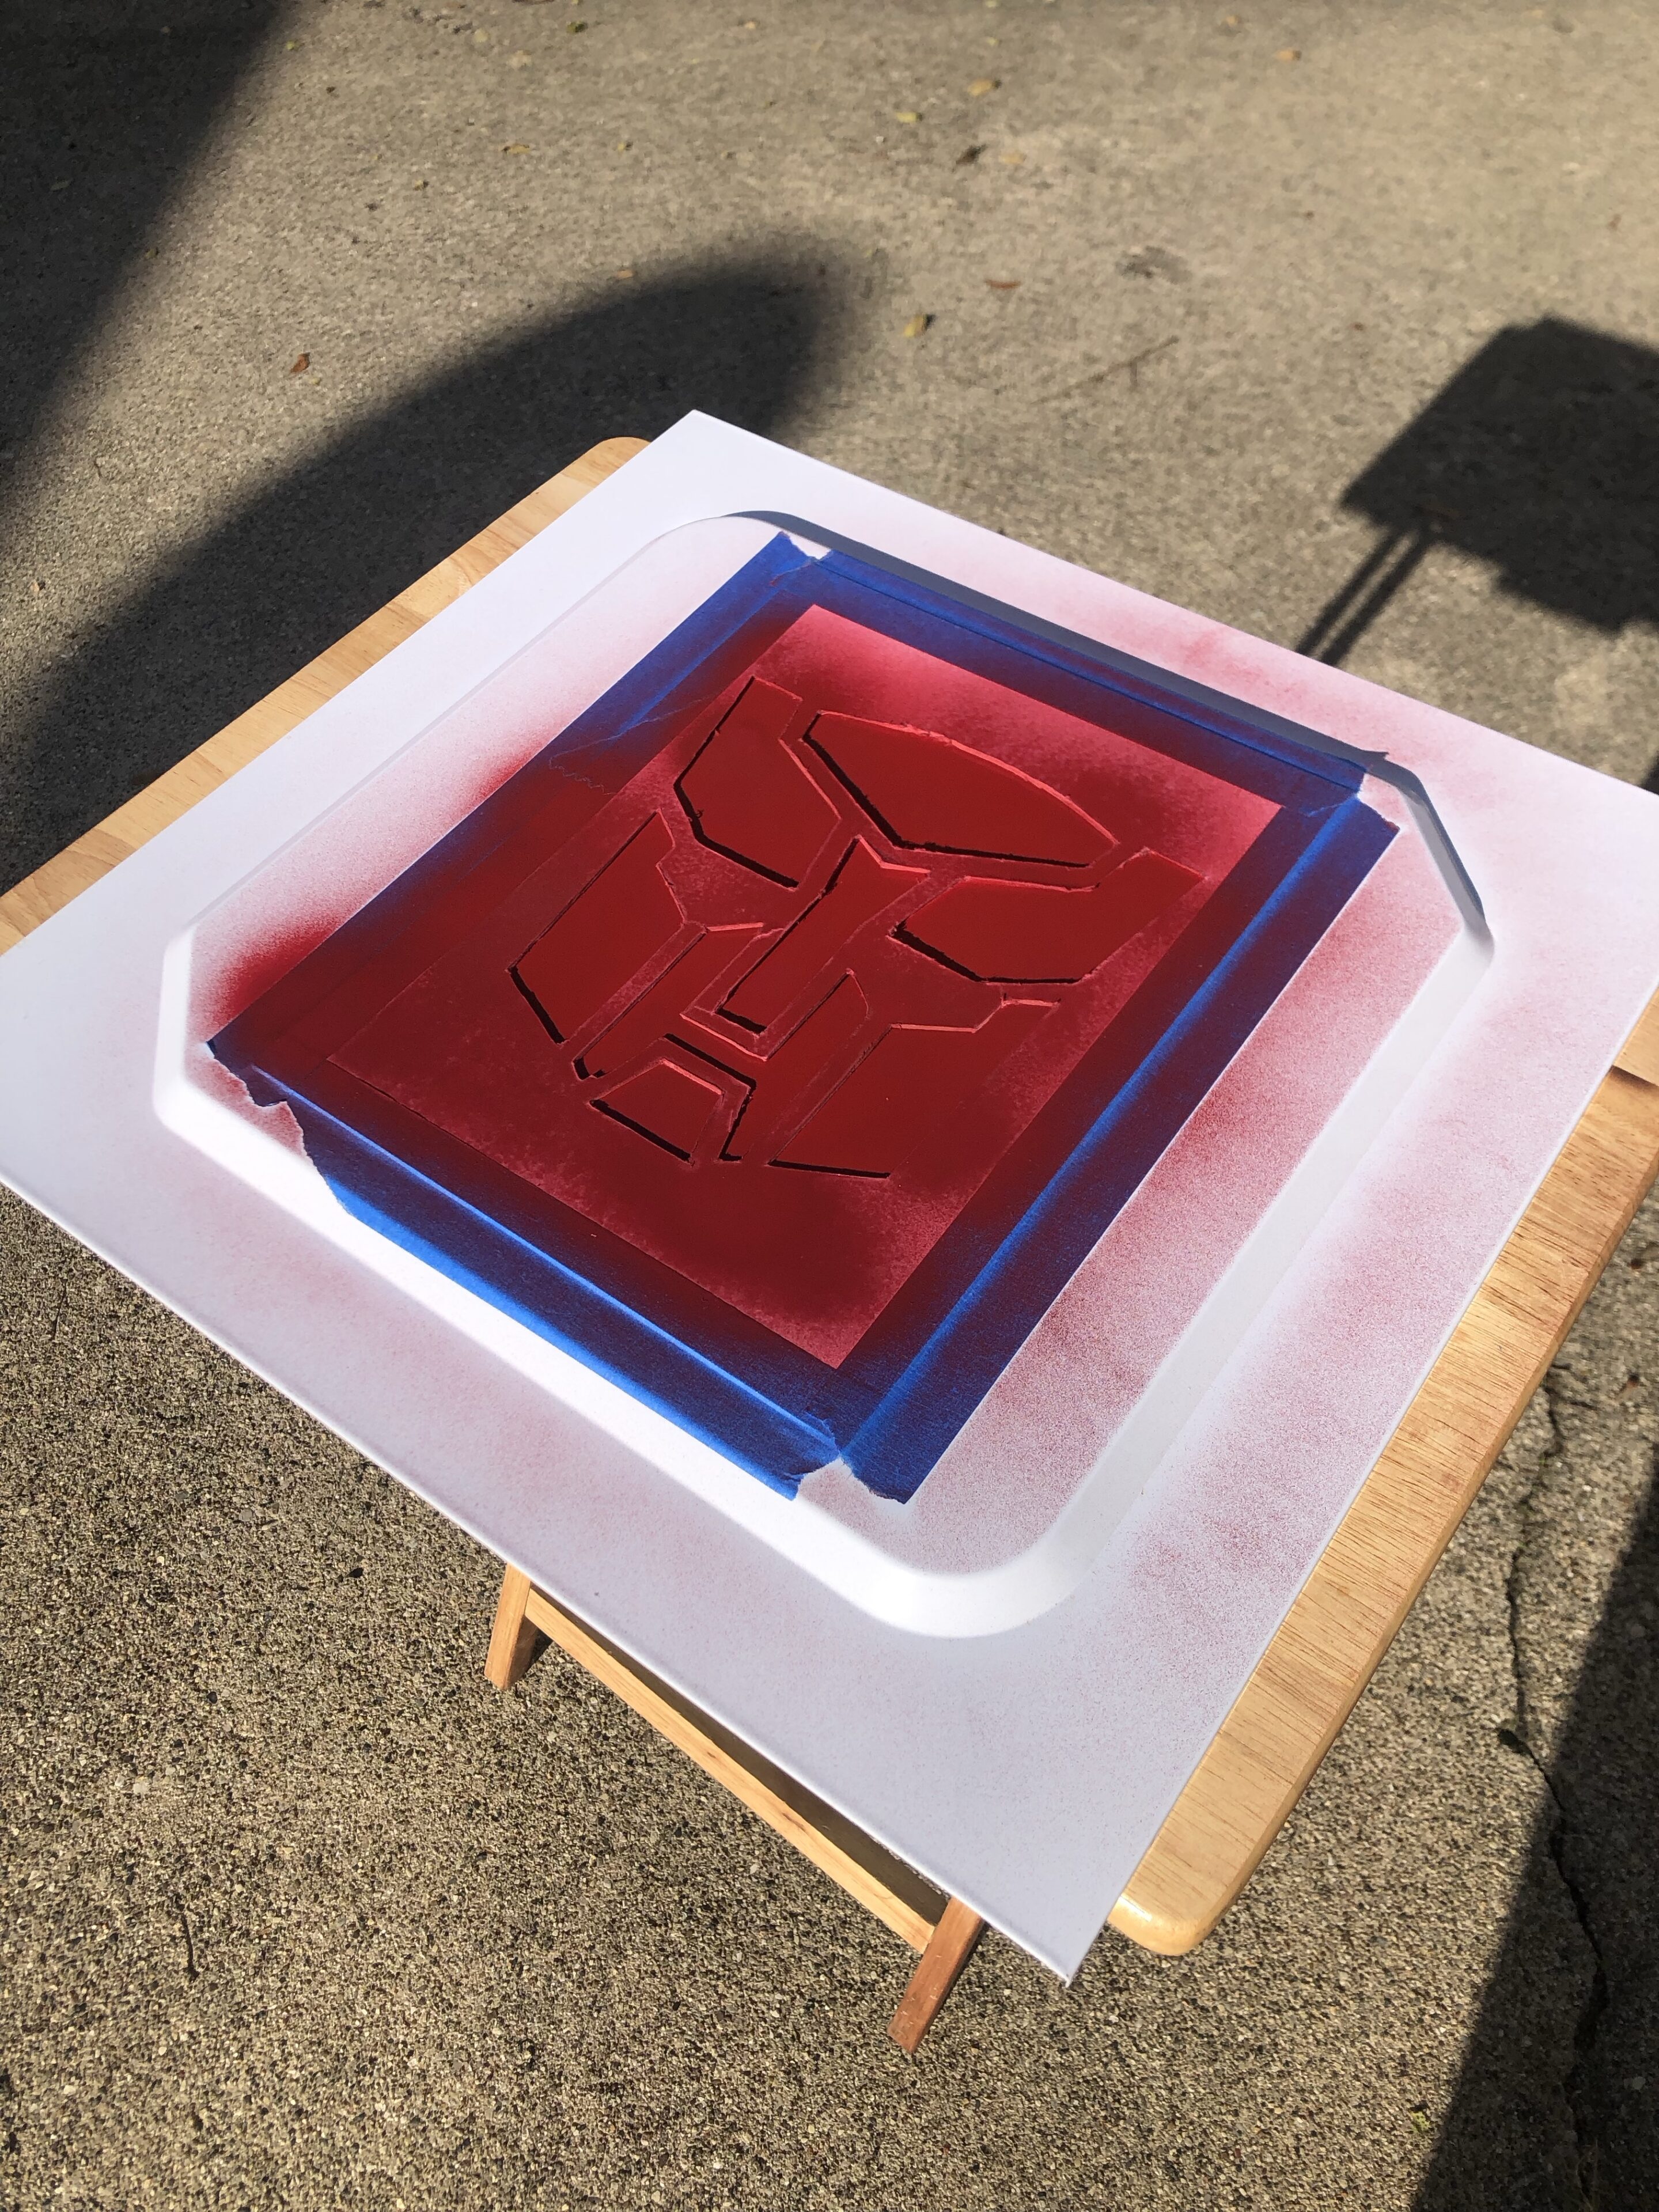
He had a solution, as well. He suggested taping over the symbol, and then going over it in blue. I used painter’s tape to make the square, and hit it with a light-ish (probably heavier than I wanted) spray and let it dry. It looked SO much better! But I wasn’t satisfied with it. Not yet. It needed just a little bit more.

Customized computer case

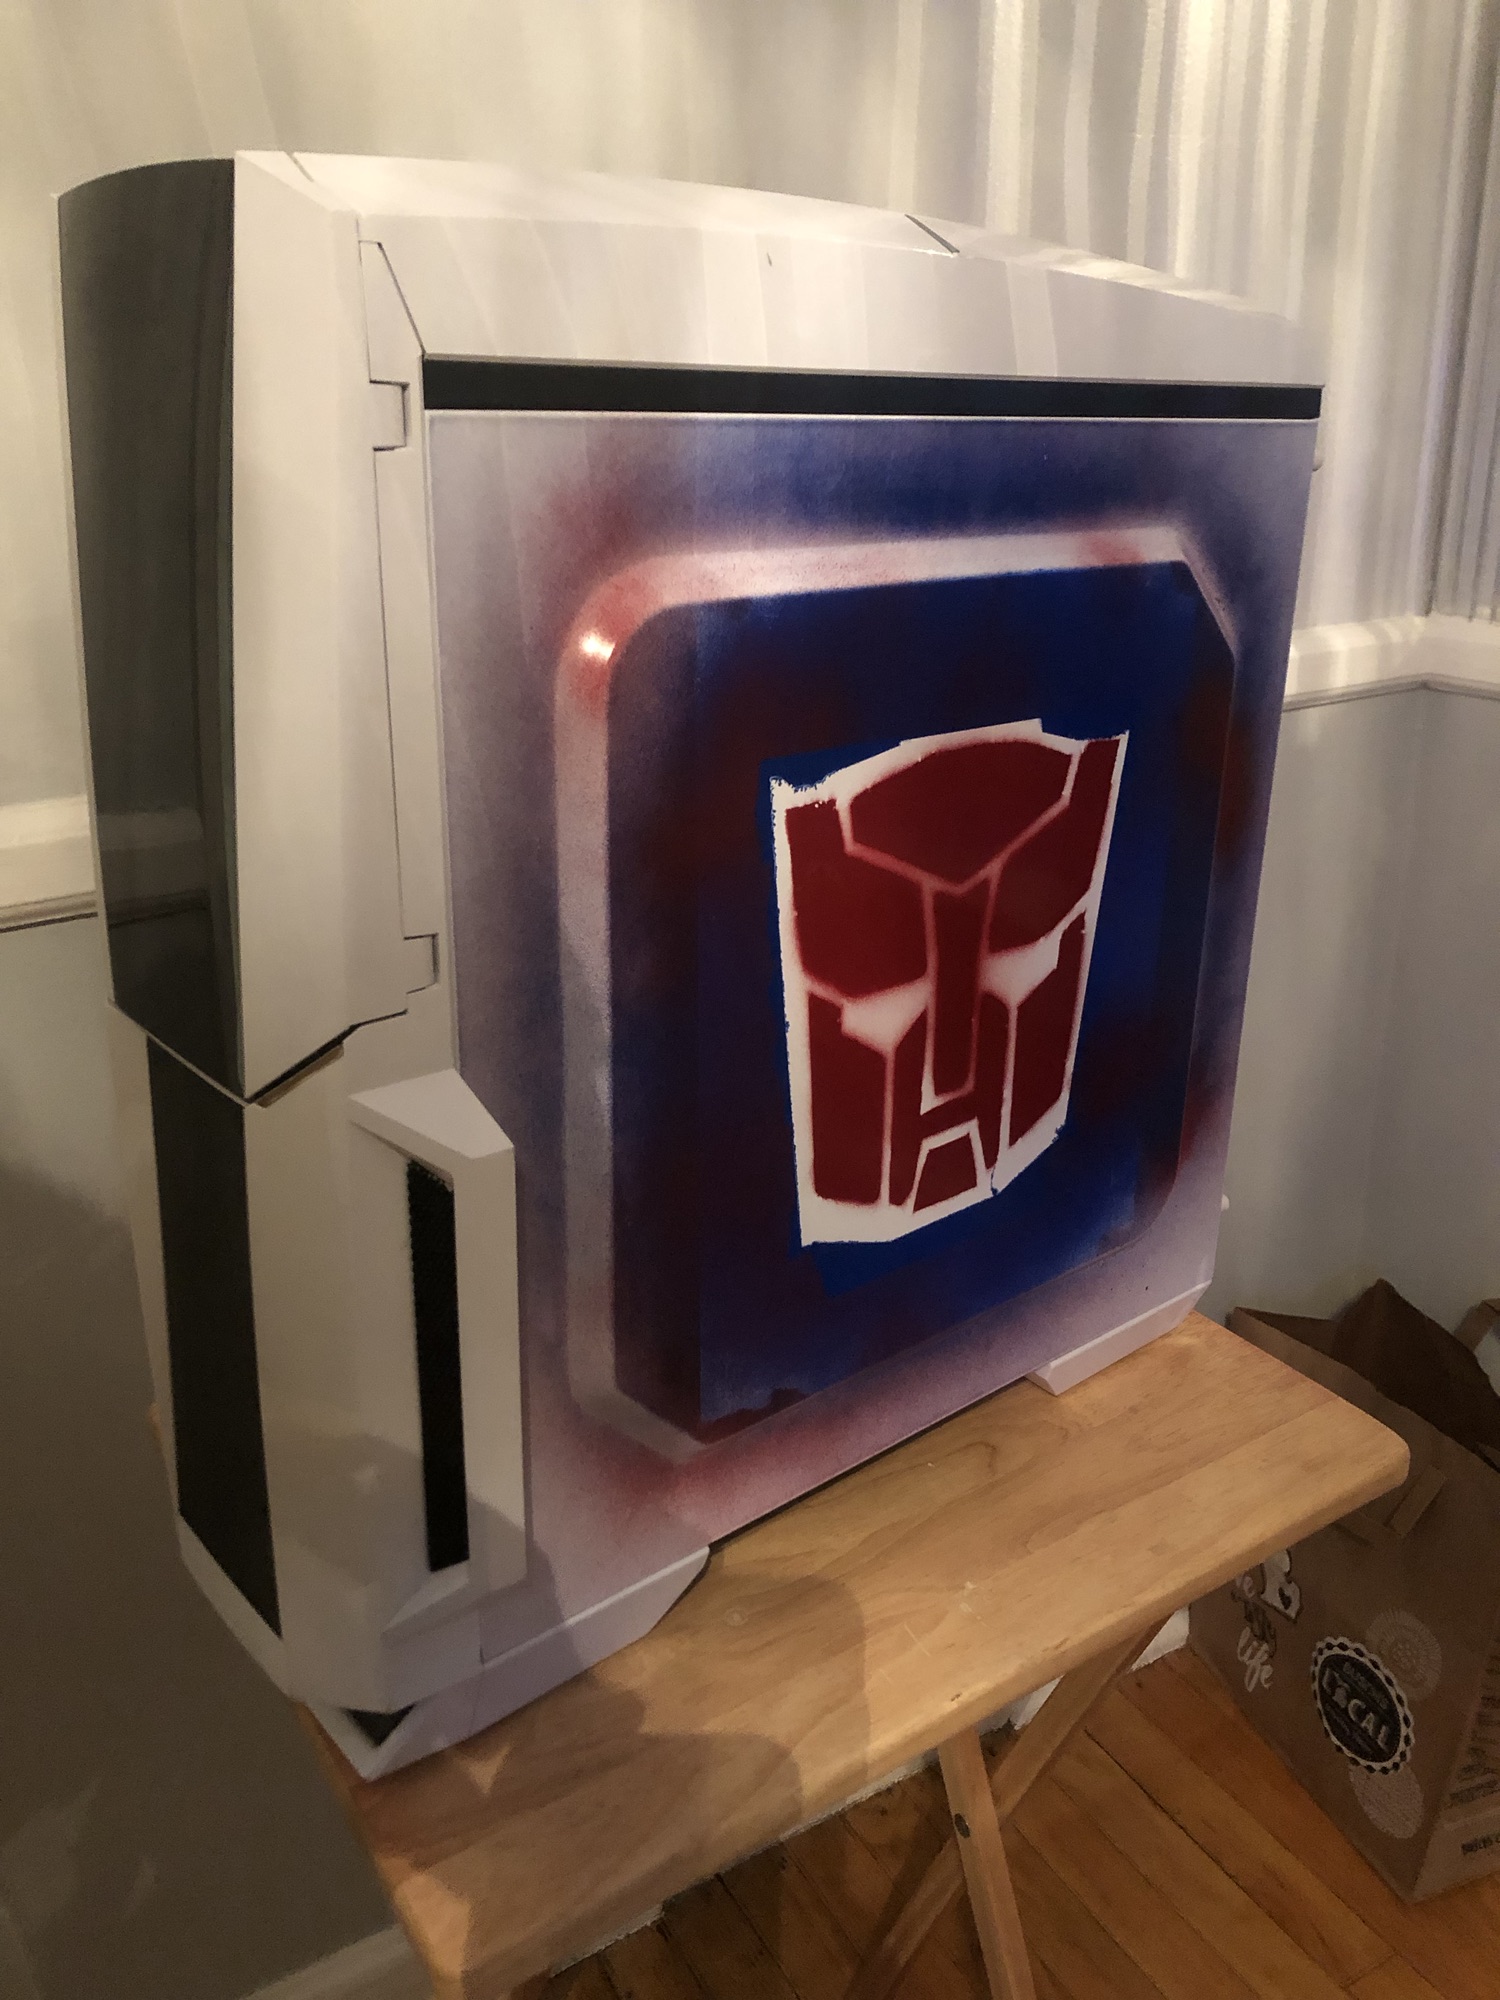
I taped again, even tighter around the symbol, and did a very light spray of red. That did it. It was just what I wanted.

You may have asked yourself why I usually ignore the urge to customize my things. I’ve got a story to tell about that, so stay tuned for a blog post down the line.

Trash to Soil

Compost bin built from old pallets

Despite my relatively short hair and deep love of showering, I’m a bit of a hippie. I reuse as much as I can. I recycle as much as I can. I prioritize buying used, rather than new, to prevent the impact of the new item’s manufacturing.

However, since the move to Detroit, I haven’t had a compost bin. I’d had one, off and on, for the last 13 years or so. When I moved to the apartment in Detroit, though, there wasn’t the opportunity to put one out back. And every time I threw out coffee grounds or banana peels or potato peels, it felt wrong to put them in the trash.

Then I bought the house. I spent that first winter without one, and still feeling wrong about it. So, when spring came, I got a line on some available used pallets out by the street in an industrial zone, and I put them into the back of the Prius wagon. Some power tool usage later, and I had an assembled compost bin, complete with a gap on the bottom for turning the compost once it got going. And it HAS been going. Kitchen scraps (no meat or bone), yard waste, and occasional grass clippings have all gone in, and have done the decomposing goodness.

I’m quite happy to have a compost bin again. It feels like another step back toward living my ideals, and that feels good.

Posted in Uncategorized | Tagged

Making Family Candles

Separated wax in bowls

Remember those crafty project posts I used to do? Well, I’ve completed a few of these projects while the site was having trouble. So, without further ado, we resume the crafty goodness!

I really enjoy making candles from old wax. When you burn a candle, there’s always some left behind, and it can either go into the trash, or it can be melted back down and formed into a new candle. I’m sure that it’s no surprise to my regular readers that I prefer the latter.

A very old box of Gulf wax

The blue wax came from some leftovers of varying shades, as well as a purple candle, if I remember correctly. The red came from a massive candle that my parents received as a housewarming gift when they moved to Shelby Township. I burned that candle, because I can’t bring myself to melt down a full, unused candle. It feels wrong. Anyway, even after burning, it produced a LARGE amount of red wax, so I had plenty to work with. The white wax came from very old “new” paraffin wax from Gulf. I was confused as to why wax would have a Gasoline manufacturer’s logo on it, so I looked up what paraffin wax is made out of.

It’s a byproduct of oil processing. *facepalm*

Finished family candles

Let’s blow on by that for a moment, and focus on the next step: making the candles. I didn’t have enough blue or green to spread throughout the candles, so I poured them in my candle, and left most of the red and white for the others. Each layer had a sprinkling of dried leaves and flowers that had been gifted to me by those related by blood and by choice. From what I’ve been told, I did a decent job of preventing bubbles, and none of the glass used has cracked or overheated. I still have a few to hand out, because I operate at a Skippy’s pace. :) All in all, this craft project was a lot of fun, and giving the candles away gives me some really good feelings. A+, would craft again.

Stop crying, Shinji.

EVA-01 model mostly assembled

Back near the beginning of the COVID-19 pandemic, I decided that I would place an order from Big Bad Toy Store for models. One for me, and one for each of the kids, and we’d assemble them together.

MonkeyLinkMega’s Dragonball Z model came together very quickly, and is still doing the model thing. It doesn’t stand up to heavy play, but it poses well.

Ace of Hearts’ Sakura model was an absolute disaster. I abandoned my own model to help with hers, and it was a complete wreck. In the end, we returned it as defective (with photographic evidence) in return for some wonderfully nerdy blankets that are still in use today.

My model was EVA-01 from Neon Genesis Evangelion. I got most of the torso assembled on that first day, but then it sat collecting dust for around a year. Off and on, I’d pay it some attention, and I got the head assembled and attached to the torso. But once again, into the dust-collecting box it went. Then came my current push to tackle unfinished projects!

EVA-01 model

I got the arms and the legs done rather quickly, but paused again – life tends to happen despite best intentions – before I finished the gun, knives, hands, etc. If I remember correctly, the kids were here when I got everything put together, raised my arms in the air, and yelled, “IT’S DONE!”

And then I turned the last page of the manual, and on the back cover was the guide to placing the rest of the incredibly small stickers. Oh, no.

I had raised false hopes in both myself and MonkeyLinkMega (because he is waiting with varying levels of patience for me to begin my next project), and then dashed them. A couple weeks later, I knew I wasn’t going to put these tiny little jerkfaces on the model all on my own, so I used my writing/crafting setup to stream it.

Now, it’s finally finished, and I think it looks great! I’ve learned that this is not my kind of thing, and that I should buy my toys pre-assembled (Lego being the exception that proves the rule). Not only do I now have a story tell, but a model to show off.

Well worth the struggle, I think.

A Dragon and a Lighter

A zippo lighter and a knock-off case

I found this lighter among a bunch of stuff on my counter, and I knew I’d had a history with it, but I couldn’t remember anything about it. For whatever reason, I immediately wanted to repair it, and get it burning again. During this process, not only did I uncover old memories, but I learned a whole lot of new stuff about it.

First and foremost, the bottom of the beautiful dragon case has MADE IN CHINA stamped across it. So, from the get-go, I assumed that the entire lighter was a knock-off. It was still worth repairing, and so that’s what I was going to do.

A tin of Zippo lighter fluid

As far as the problems with the lighter, I know I’d fiddled with the wick, and sure enough, it was pulled apart and splayed all over the flame’s chamber. After watching a bunch of lighter restorations on Odd Tinkering, I figured I would have to replace the wick and refill the fluid, and then give it another shot. After a suggestion from Honal in my stream‘s chat, I managed to pull up the wick and trim off the mangled bit, rather than replacing the whole thing..

I took the lighter completely apart, which led me to discover that there were two flints sitting in the spring, rather than one. The second one, upon release from its prison, shot off to forever reside between my floor boards. Goodbye, secondary flint. I barely knew ye.

At this point I was able to pull the wick up pretty easily, and clip the top off with craft clippers. I was also able to buy some lighter fluid from Marcus Market nearby. I put it all together, and it worked again! It lit in the first couple of spins of the wheel, and stayed lit, even in the wind!

Dragon zippo lighter with lit cigar resting on it

Next came the real test – lighting a cigar. It singed the edge evenly, and lit the tip of the cigar evenly and quickly. It’s a good lighter, and it works!

As I was taking some photos, I discovered that there was some etching on the lighter itself. It was the manufacturer stamping from Zippo! While the case is definitely a knockoff, the lighter itself was genuine. Now I had even more questions about the lighter’s history, and how it had come to be in its present state, and how it had managed to come into my life.

About a week later, I re-learned why I’d been trying to fix this lighter in the first place, which had ended with me mangling the wick. It wouldn’t light. It acted like it was completely out of fluid. I must have thought that either the fluid was being prevented from being brought upward, or that the wick wasn’t close enough to the spark wheel to light.

So, with the patience of middle age (ha!) and access to the internet, I googled how long I should expect lighter fluid to last in a Zippo. The consensus seems to be anywhere between one week and one month, depending on regularity of use. The more often the lighter is used, the longer the fluid lasts.

The lighter hadn’t been broken. I had used it rarely, even then, so the fluid was just evaporating away. My expectations that it would last longer was the actual problem, not the wick. Well, now I have a beautiful working wind-proof lighter, part Zippo, part knock-off, AND the knowledge to take proper care of it.

Sealed Drinkware

Coffee table with craft mugs

I have drink ware that needed to be sealed. And for the love of cheese, I was going to do it right this time.

The middle mug, after it was stickered, was covered in a layer of nail polish clear coat, on Ace’s suggestion. It worked well for a little while, but the stickers eventually soaked up water while in the sink being washed. So I consulted with some of my crafty friends for advice.

Enter Mod Podge Dishwasher Safe. The kids and I picked it up from a Michaels, and when I decided to start wrapping up projects, I pulled it out of the bag. The sealant went on very easily, and the glossy finish dried shiny and smooth. I did three coats, and let each one fully dry before I started the next.

Before you follow my lead, there’s a bit of a gotcha. Because of course there is. This particular formulation of Mod Podge requires 28 DAYS, that’s right, a LUNAR MONTH, to fully cure and be top-rack dishwasher safe. So now my mugs and Ace’s water bottle sit on top of the refrigerator, awaiting their release back into rotation.

Soon, my pretties, SOON.

Wall of You Accomplished Something, Actually

Wall of certificates

So, I do this thing where I talk down about myself. I do it a lot more than my friends and family would like. Sometimes, they get irritated enough to remind me how much they dislike it.

At the same time, I have these certificates, from things I’ve accomplished in my life. Eagle Scout in the BSA. Graduated high school with high honors. Published my own first novel. Donated hair to be used in wigs for kids with cancer. I always felt that putting these up on the wall was a form of bragging, so I never did.

After a recent reminder about my self-deprecating habits, I decided that hanging these certificates on the wall would be a form of self-affirmation. I would put them on a place where I would see them every day, and thus remind myself that I can have, and have had, a positive impact on the world. Enough of an impact, in fact, that someone gave me a piece of paper to remind me.

So I did. I framed them and hung them in my bedroom, on the side of the room where I always get off my bed. They cannot be avoided, and I think that’s a good thing. My friends and family are to credit for this, and I love them for it.

Take that, brain!

Crafty learning

photoI’ve learned something from this little project. I’ve learned not to use paint left in my house by the previous owner, that has likely gone bad, with a stencil project. No matter how much you stir the paint, the oily and watery parts will seep beneath the stencil, and into the parts of the cover that have been scored by what looks to be a mechanical pencil tip, and create a mess.

It’s a neat-looking mess. Once it dried (four days!), I put the stencil back on, and went over it with a black marker. Marker doesn’t usually stay on paint, I’ve been told, but the black dry erase marker that I used (hey, it was just sitting there, on my desk, unused and unloved) seems to have gone permanent. I’m not gonna complain.

The symbol is from Tron: Uprising, though modified slightly for stenciling. The end look makes me think of graffiti, which ties in nicely with the last few episodes of the first season of the show. Silver lining!

I’m pretty happy with all of my journals now, so my next craft project will likely involve a Dresden Codak patch and my new work backpack.